ICYMI: Pinterest is more than a social network. It’s a visual search engine, productivity tool, and e-commerce powerhouse for brands of all sizes.
Case in point: Pinterest users spend twice as much time shopping every month as non-Pinners.
And it doesn’t hurt that it’s Megan Thee Stallion’s favorite app.
The question is, should your brand tap into Pinterest’s unwavering potential in 2025?
With secret tips and tricks from two Pinterest experts, we’re pinning all the details down below.
Key takeaways
- Pinterest marketing is the practice of using the platform as a visual search engine to help relevant audiences discover products or services.
- Unlike paid social ads, Pinterest content seamlessly blends into user feeds, making it an effective tool for building brand awareness, driving traffic, and boosting conversions.
- Key tips for success include optimizing Pins with SEO keywords, experimenting with how-to content, and staying adaptable to new features and trends. Patience is essential, as Pinterest content often gains traction over time rather than immediately.
What is Pinterest marketing?
Pinterest marketing is a type of social media marketing where brands aim to build awareness and reach new audiences for their products or services on Pinterest.
Where ads on other social platforms disrupt the flow of content, Pinterest marketing blends seamlessly into a feed of aesthetic content — making it a worthy option to add to your social media marketing strategy.
“Content from brands doesn’t interrupt on Pinterest — it inspires.” — Pinterest
According to Pinterest Business, social media marketers turn to the platform to:
- Reach a new audience and grow their business presence online
- Drive traffic to their brand’s website or online store
- Encourage conversions like newsletter sign-ups, report downloads, and best of all — purchases
What is affiliate marketing on Pinterest?
Affiliate marketing on Pinterest is a revenue-sharing process where Pinners earn a small commission from the clicks or sales they generate for a brand.
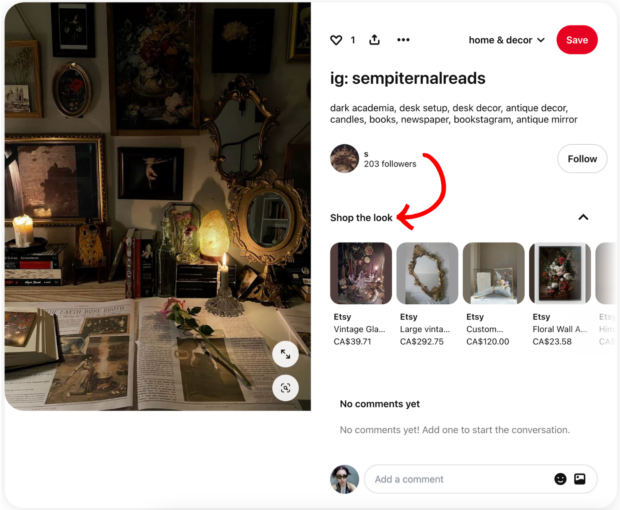
The strategy? One-of-a-kind, trackable links attached to Pins.
The opportunity is two-fold: Easy purchasing for customers, and fast, low-cost results for your company.
Why is Pinterest a valuable platform for brands?
When it comes to Pinterest marketing, the results speak for themselves.
Brand awareness
At the heart of Pinterest is discovery.
Proof: 80% of Pinners have discovered a new brand or product on Pinterest.
And in the Wild West of home decor and fashion trends, freelance Content Marketer and Strategist D’Loraine Miranda says, “Having a presence on Pinterest can give your brand credibility.”
Users take to the platform to discover new products, brands, and projects — while using other social networks to connect with loved ones and pop culture.
Plus, 96% of Pinterest’s top searches are unbranded, making the platform a goldmine of untapped potential.
Reach new shoppers
Play your cards right and your Pinterest strategy could have you seeing (several) dollar signs.
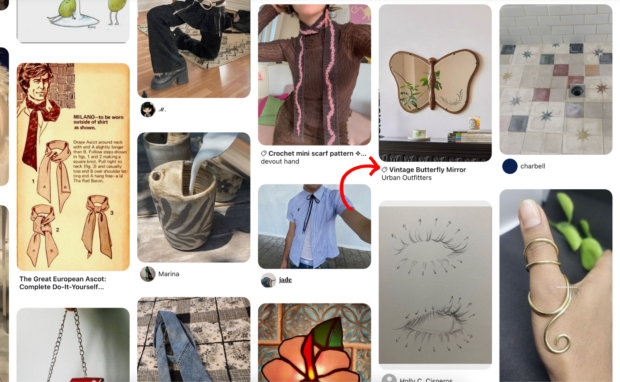
It’s true: 75% of weekly Pinterest users say they’re always shopping.
Source: Pinterest
Olivia Sabotnicu, freelance Growth Marketing Consultant, knows this best.
“Unlike other platforms, Pinterest users often exhibit a stronger intent to purchase or plan, as they curate boards for ideas, wish lists, and inspiration,” Olivia says.
D’Loraine is aligned. “A lot of users come to the platform to shop, meaning you can attract and convert customers, and hopefully drive sales,” she adds.
More proof, in case you’re not yet convinced:
- Pinterest offers a mix of free and paid advertising tools, and combining both can earn you 3x more conversions and twice the ROAS (return on ad spend) versus paid ads alone
- Pinterest ads bring in 11.4x more prospects than other social media platforms (yes, you read that right)
- Pinterest saw a 50% YoY increase in buyable items saved to boards in 2024
Olivia’s takeaway? “If your brand can seamlessly fit into this environment, positioning yourself as an option becomes essential.”
Bonus: Download a free guide that teaches you how to make money with Pinterest advertising in six easy steps, using the tools you already have.
Community building
Pinterest Community lets Pinterest users connect with other brands and creators in their niche to discuss tips and tricks, questions, and simply connect.
Joining (or creating) a community is a no-brainer for brands to build direct relationships with your industry’s influencers, and get even more users to engage with your account.
Plus, Group Boards — shared Pinterest boards that multiple Pinterest users Pin to — unlock a whole new world of collaboration and exposure!
How to build a smart Pinterest marketing strategy
Step-by-step, here’s how to build a results-driven Pinterest content strategy.
1. Determine potential ROI
As Olivia puts it, “Pinterest can be highly valuable for certain brands, but not universally for all.”
In other words, ask: Is it on-brand for us to use Pinterest?
Olivia says Pinterest works exceptionally well for home decor and parenting brands, for example. SaaS and services brands, on the other hand, may face challenges.
“Before committing time and budget to the platform, it’s crucial to assess whether your target audience is present, what they’re doing there, and what they’re searching for,” Olivia says.
Once you’ve answered these questions, “determine if your messaging and visuals can be adapted to align with that audience’s mindset and activity,” Olivia adds.
But if Pinterest doesn’t sound like it makes sense for your brand, Olivia says there is some saving grace.
“If you identify something relevant that your ideal customer might search for, you can still engage them,” she says.
“For instance, travel enthusiasts looking for tips might be intrigued by promoted Pins highlighting micro-financing options for their next adventure.”
In this case, developing affiliate marketing efforts or a paid marketing strategy for Pinterest may be your forte!
2. Set SMART goals
Before you get down to business, it’s essential to define your SMART goals and metrics:
- Specific
- Measurable
- Attainable
- Relevant
- Time-bound
Are you looking to build brand awareness? Drive clicks? Generate more leads?
This will allow you to outline your Pinterest marketing strategy with specific results.
3. Pin down your Pinterest audience
As Olivia mentioned, set aside ample time to learn about the general Pinterest audience and the demographic that is most likely to use this channel — before committing time and budget to the platform.
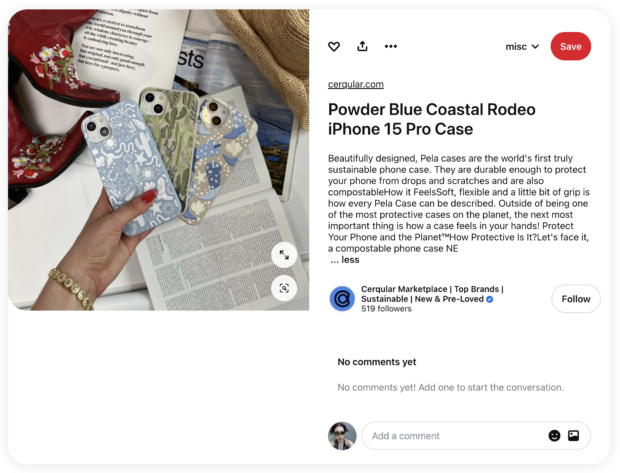
For example, Gen Z makes up 42% of Pinterest’s monthly active users, which might conflict with your audience on other platforms like Facebook.
This may mean tailoring your Pinterest content to be vibrant, authentic, and socially aware — and incorporate trending topics, social issues, and environmentally sustainable practices to resonate.
Source: Pinterest
Read 23 Pinterest Demographics for Social Media Marketers for more on determining your target audience.
4. Scope (and track) the competition
When it comes to creating a fruitful Pinterest marketing strategy, don’t be afraid to take a peek in your own backyard for inspiration.
Make note of content, influencer partners, affiliate programs, posting frequency, and the strengths and weaknesses of brands in your industry.
What are they doing well? What can you do better?
Pro tip: Use Hootsuite Listening to track what people are saying about you, your top competitors, and your products.
5. Plan (and schedule) content
You’ve set your goals, you know your target audience, and you’ve got eyes on the competition — the natural next step is to create a Pinterest-worthy batch of content.
And if you don’t have the bandwidth to create brand new materials for Pinterest just yet, don’t sweat. OwlyWriter AI unlocks fresh new ideas for Pinterest Pins in the matter of seconds. You can even use it to help you write compelling copy.
Plus, plenty of brands repurpose media, like TikToks and Reels, to save time and get more value from their content.
And when Gen Z makes up 42% of Pinterest’s monthly active users — cross-posting short, captivating video Pins is effective in driving engagement.
Once you have a batch of content to work with, the next step is to plan and incorporate on-brand content for Pinterest into your social media content calendar.
Luckily, Hootsuite has you covered for easy scheduling and content management — Pinterest and beyond.
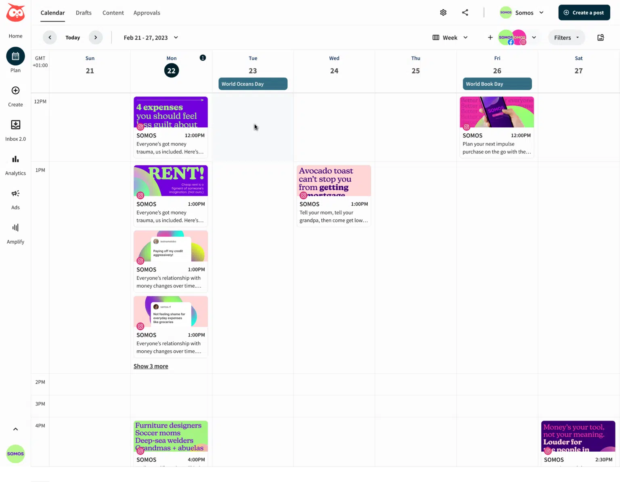
And once your posts are scheduled, you can review and edit them from a single calendar that gives you a bird’s eye view of your content plan across social channels. No, you’re not dreaming.
6. Analyze & adjust
Once your Pinterest posting cadence is a well-oiled machine, it’s important to keep track of what’s working and what’s not, and adjust.
Are users resonating with your content? What are the month’s top and bottom performing posts? How are you tracking towards your goals?
In any case, we recommend an analytics tool for smooth sailing.
Good news: Hootsuite Analytics lets you easily track the performance of all your social channels in one place, so you can replicate what works and get more engagement.
The tool also makes it easy to create custom reports to showcase your results to your boss and share insights with your team.
8 foolproof tips from Pinterest marketing experts
Get ready to take notes.
1. Be patient (and realistic)
A repeat and necessary social media management reminder from D’Loraine: “Don’t be discouraged if you don’t see results right away.”
“Oftentimes, people forget Pinterest isn’t chronological like other platforms. I’ve experienced Pins from months (even years) past blow up overnight based on trending topics and what users are searching for,” D’Loraine adds.
Olivia can relate. In 2020, the marketer ran a Pinterest campaign for a fashion e-commerce client that struggled to achieve conversions at the company’s price point.
“Reflecting on it now, I see that the short duration (only a few weeks) and tight budget didn’t allow for sufficient testing and optimization,” Olivia explains.
“Patience and realistic targets are essential for success.”
2. Optimize your Pins
Olivia’s top tip to appease the algorithm? “Treat Pinterest like a search engine.”
“Invest time in finding relevant keywords used in similar products to optimize your content’s discoverability,” she adds.
D’Loraine couldn’t agree more. “Pinterest is essentially a visual search engine, which means Pinterest SEO is key. If you want your content front and center, take the time to do keyword research.”
Like having users discover your Pinterest profile based on their boards:
“Don’t forget to include keywords in Pin descriptions, headers, alt text, text overlay, board descriptions, etc.” D’Loraine’s advises. (And hashtags!).
Her secret weapon? Pinterest Trends, “a great tool to gauge when keywords will be trending and what users are searching for month over month.”
Keeping tabs (and planning ahead) will keep from scrambling last minute and overstuffing keywords into your copy — a mishap D’Loraine says could hurt your chances of discovery.
3. Track everything
You know the drill. Tracking and analytics is essential for any successful social media strategy, Pinterest included.
Olivia’s advice: “Use UTMs on your links to monitor performance and gain insights into what drives traffic.”
4. Use website links strategically
In addition to UTMs, Olivia says the links you attach to your content should be used strategically.
“The ultimate goal should be to direct traffic to your website, where conversions happen,” she says.
“Ensure your pins link back to key pages.” Pages that make sense — like a product Pin that links to buy.
5. Experiment with how-to content
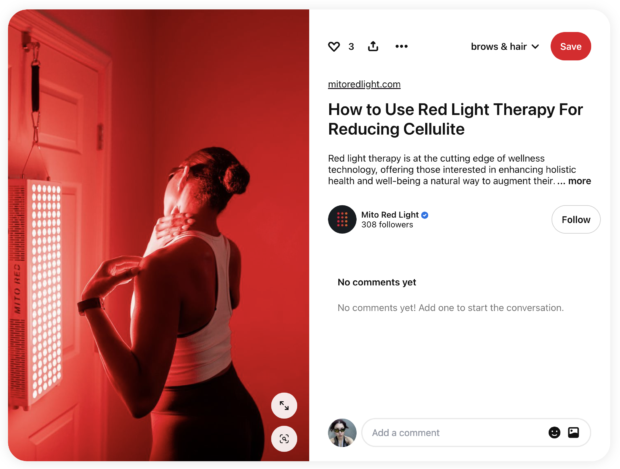
Take it from D’Loraine’s experience at Pinterest — how-to content is an engagement magnet.
Source: Pinterest
“Users come to Pinterest in search of ideas (think: DIYs and tutorials). So, if you’re a small business specializing in fashion, put together some styling guides featuring your products. If you sell wallpaper, make a tutorial on how to apply it,” she says.
Especially on Pinterest, it’s all about meeting consumers where they’re at.
6. Format images
According to Olivia, a little extra effort can make all the difference on a visual platform like Pinterest.
“Avoid simply pinning images from your website,” she advises.
“[Especially for ads] create dedicated, high-quality pins tailored to Pinterest’s preferred formats to stand out.”
7. Think seasonally
‘Tis the season, whichever one it may be!
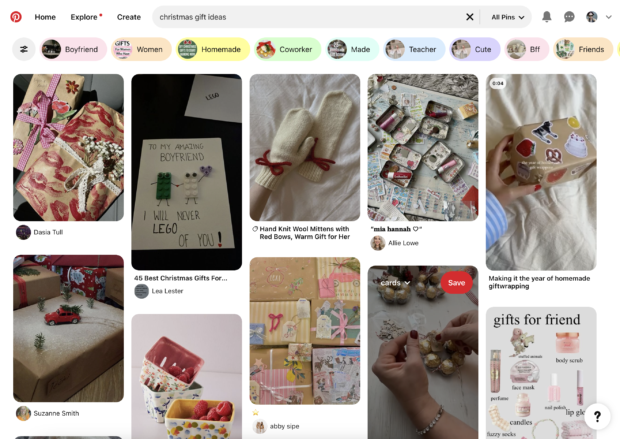
Because as D’Loraine shares, “You can gauge what topics people are interested in at certain moments of the year.”
“For example, come January, users will undoubtedly be searching for content adjacent to New Year’s resolutions like healthy recipes, fitness, self-help, and money. Knowing what’s top of mind for users during certain times of year can help you optimize your content in order to reach a wider audience.”
Source: Pinterest
Another reason to plan your content in advance!
8. Be adaptable
Like any social media platform, D’Loraine says that change is inevitable on Pinterest.
“Pinterest is always rolling out new features, whether it be Idea Pins or collages. Platforms usually prioritize this type of content, so get out there and experiment,” she says.
What’s trending among consumers is always changing, too. D’Loraine recommends the annual Pinterest Predicts report to stay in-the-know.
“A few years ago, Pinterest predicted the rise in ‘skinimalism’ (a ‘less is more’ approach to beauty and skincare), and I feel it’s still relevant,” D’Loraine says.
Pro tip: Read Hootsuite’s 2025 Social Media Trends report for the latest in all things social media.
5 Pinterest marketing tools
Psst: Pinterest suggests that “using a third-party platform can help to increase how much and how often you post, with minimal added effort.”
So, here are five powerful tools for Pinterest marketers:
1. Hootsuite
Best for: Business owners who run their own social media, social media managers at small-to-medium-sized businesses, and large marketing teams
Coolest feature: Create new boards and Pin to multiple boards at once
Price: Starting at $99/month
From an intuitive social media scheduler and planner to in-depth analytics, Hootsuite brings everything to one place so you get more done and save time along the way.
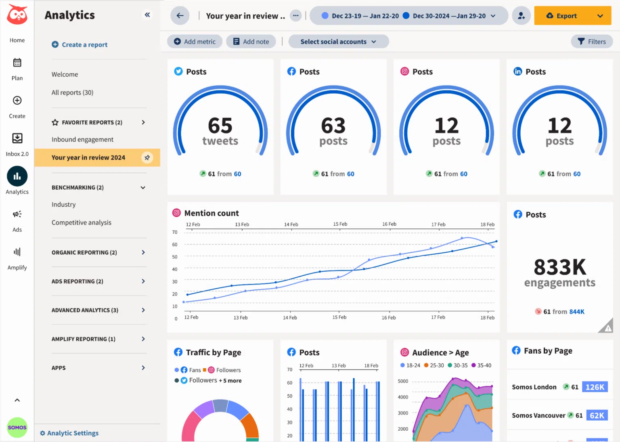
You can easily manage and grow your Pinterest presence alongside all of your other social accounts with Hootsuite, your all-in-one social media management tool.
- Schedule Pins in advance
- Create new public or private Pinterest boards
- Ensure your Pins always the right size and aspect ratio with Canva templates right in Hootsuite Composer
- Track your results in real-time
- Create custom reports to showcase your success
- Handle Pinterest, Instagram, TikTok, Facebook, Twitter, YouTube, and LinkedIn from one dashboard
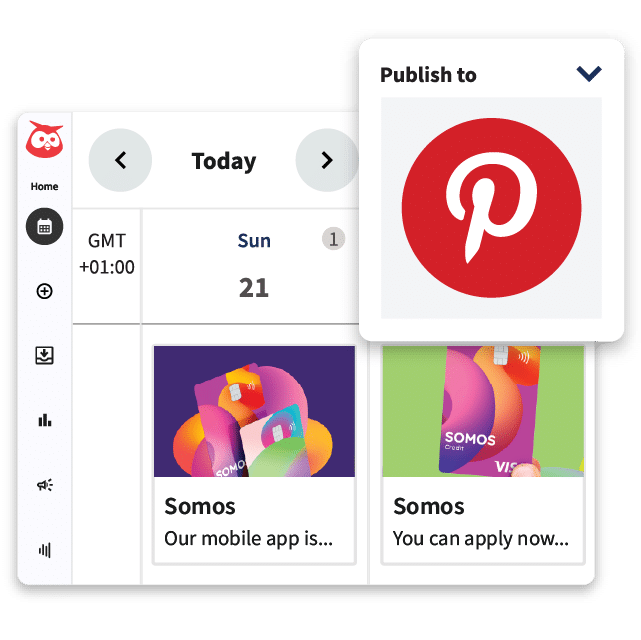
Schedule Pins and measure their performance from one simple dashboard. It’s seriously easy.
Start free 30-day trial2. Pinterest’s in-app tools
Best for: Brands and freelancers dipping their toes into Pinterest marketing
Coolest feature: Auto-publish Instagram content directly to Pinterest up to two weeks in advance
Price: Free
Did you know that with a Pinterest Business account, you can auto-publish your Instagram content directly to Pinterest, up to two weeks in advance?
While limited, this means your OOTDs, recipe videos, and home decor inspiration can reach Pinterest’s 520 million+ monthly users — all within a few taps.
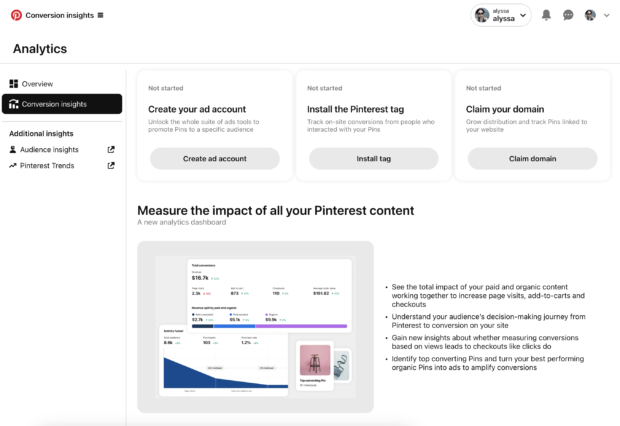
Source: Pinterest Analytics
Plus, Pinterest’s native analytics tool is a good option if you’re looking for data directly within the platform.
Note: Pinterest’s in-app tools are not available on personal accounts.
3. Canva
Best for: Amateur designers and smaller social teams looking to create quick, aesthetic Pins
Coolest feature: Pinterest templates for occasions and industries of all types
Price: Pro plans starting at $10/month
Whether you’re an amateur designer or a creative pro, Canva is a one stop shop for creating eye-catching designs — including Pins.
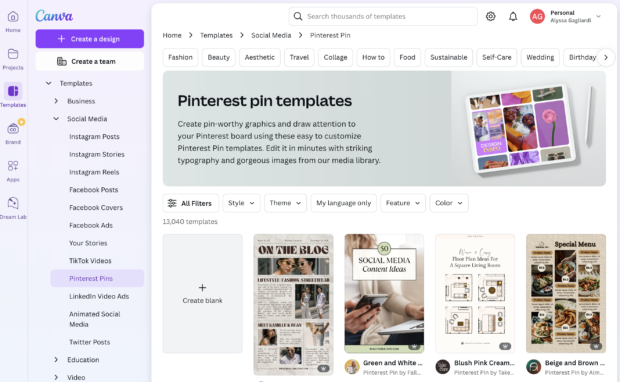
Source: Canva
And while the platform has plenty of Pinterest templates ready to experiment with, you’ll have to take your content scheduling and analytics elsewhere.
4. Adobe
Best for: Brands with in-house designers capable of creating advanced visual content
Coolest feature: Custom and animated Pins with Adobe Express
Price: Premium plans starting at $12.99/month
Packed with a suite of visual media apps — like Photoshop, Illustration, and Lightroom — Adobe is a good option for brands looking to create premium quality Pins.
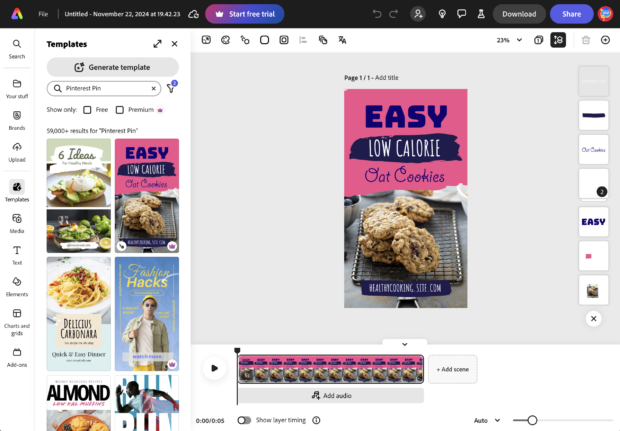
Source: Adobe Express
But with great power comes great responsibility (an in-house designer with the hardware to sustain Adobe’s memory-heavy apps).
And although Adobe Express has Pin templates, the limited options will cost you.
5. Sprout Social
Best for: Marketing teams at large organizations
Coolest feature: Ready-made reports depending on your goals
Price: Starting at $199/month
For social media managers at enterprise companies looking to streamline their Pinterest (and overall social media) efforts, Sprout Social is a popular choice.
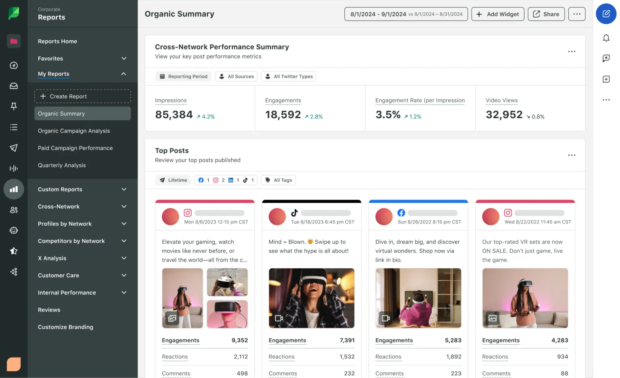
Source: Sprout Social
Sprout is on the pricier side compared to Hootsuite. See how it compares in terms of features and integrations.
So, are you ready to get started with Pinterest marketing?
Bookmark these tips and get cracking — we’ll see you on our feed!
Save time managing your Pinterest presence using Hootsuite. Compose, schedule, and publish Pins, create new boards, Pin to multiple boards at once, and run all your other social media profiles — all from one intuitive dashboard. Try it free today.


