
If your brand or business uses Facebook, you should be using Facebook Business Manager. Part of the Meta Business Suite, the tool keeps your Facebook business assets safe, centralized, and organized, whether you’re a team of one or 10.
If you’ve been putting off setting up Business Manager because you weren’t quite sure how it works, we’ve got good news. In just 10 simple steps, this tutorial will teach you how to do everything from setting up your account to placing your first ad campaign.
Let’s dive into what Facebook Business Manager is, who can benefit from creating an account, and how to set up an account for your brand.
What is Facebook Business Manager (aka Meta Business Manager)?
Facebook Business Manager, now called Meta Business Manager, is a free platform that helps you manage and organize your business on Facebook. Meta further explains that Business Manager “helps advertisers integrate Facebook marketing efforts across their business and with external partners.”
Basically, it’s a central dashboard to manage all of your Facebook marketing and advertising activities. You can also control multiple users’ access to your Facebook page and assets, along with additional resources like your Instagram account and product catalogs.
Here are some of the key functions of Business Manager:
- It’s a central place to track Facebook and Instagram ads, with detailed reports showing how your ads perform.
- It allows you to give vendors, partners, and agencies access to your pages and ads without handing over ownership of the assets.
- It keeps your business activities separate from your personal profile, so you don’t have to worry about posting in the wrong place (or getting distracted by cat videos when you’re trying to work).
If you’re still unsure if setting up a Meta Business Manager account is right for you, let’s go over who should use it and why.
Why should you create a Meta Business Manager account?
There are several scenarios you may be in where you’d benefit from having a Meta Business Manager account. Here are a few reasons to create an account:
- You’re a brand social media manager: If you’re a social media manager or another marketing team member at a business, then Meta Business Manager is the tool you need. Business Manager makes it easy for multiple people to access and manage your Facebook or Instagram business pages.
- You’re a creator or business owner: In addition to helping you organize and manage your business, Business Manager helps separate your brand from your personal account. Your audience won’t see your personal Facebook information — they’ll only associate your brand with the information you choose to share such as your name, work email, and Pages and ad accounts.
- You manage multiple assets or accounts: If you manage multiple Facebook or Instagram assets such as Facebook Pages, ad accounts, or apps for your business, then having one central platform helps keep everything organized.
- You work with external vendors: Do you work with a marketing agency or freelance social media manager to help create, run, or manage your Facebook Pages or ads? Meta Business Manager makes it easy to give access to external team members while ensuring you and your business maintain ownership of all your assets.
If you find yourself in one of these situations, let’s go over how to set up your Meta Business Manager account.
How to set up Meta Business Manager in 10 steps
Before you create your Meta Business Manager account, it’s important to note a couple of requirements:
- You must have a personal Facebook account to create a Facebook Business Manager account. Your personal account is used to log in and confirm your identity.
- You can only create up to two Business Manager accounts.
Now that those steps are squared away, let’s go over the steps to set up your Meta Business Manager account.
Step 1. Create your Business Manager account
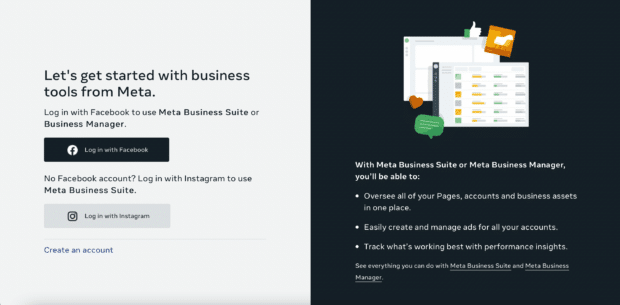
1. Go to business.facebook.com. You can log into your Facebook or Instagram account or create a new account.
2. To create your business account in Business Manager, enter your business and account name. You’ll also need to add your name and business email to verify the account. Hit Submit to create your account.

3. Check your email for a message with the subject line “Confirm your business email.” Within the message, click Confirm Now.
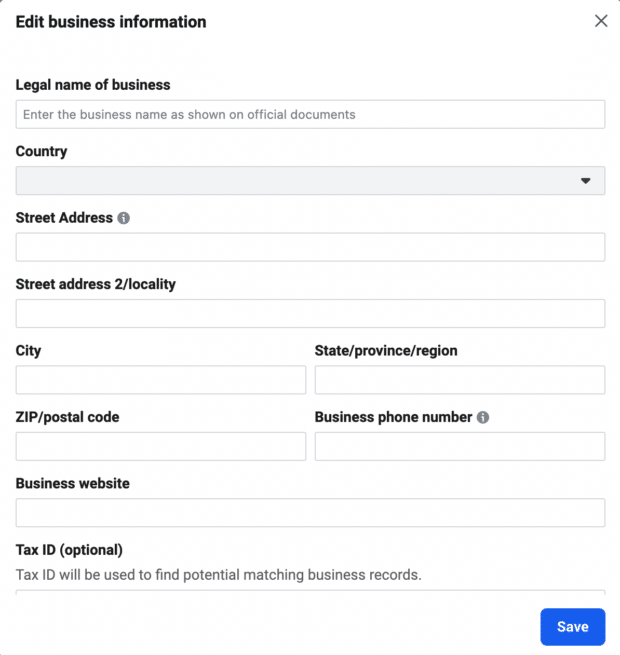
4. Once you’ve confirmed your account, it’s time to add your business details. This information includes your business’s legal name, address, phone number, and website.
Step 2. Add your Facebook Business Page(s)
In this step, you have a couple of different choices. You can add an existing Facebook business page or create a new one. If you manage Facebook pages for clients or other businesses, you can also request access to someone else’s page.
That last distinction is important. While you can use Business Manager to manage clients’ Facebook pages and ad accounts, it’s important to use the Request Access option rather than the Add Page option. If you add your client’s pages and ad accounts to your Business Manager, they’ll have limited access to their own business assets. That’s a sure way to cause tension in your business relationship.
For the purposes of this post, we’ll assume you’re managing your own assets rather than acting as an agency, so we won’t get into the Request Access process. But be sure to keep this difference in mind.
If you haven’t created your Facebook Business page yet, we have a video tutorial that walks you through setting one up. Hop on over to the video above and come back here to add your page to Facebook Business Manager when you’re done.
To add your Facebook page to Facebook Business Manager:
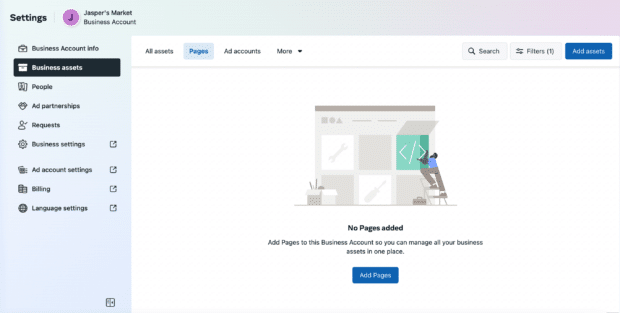
1. From the Business Manager menu, click Business assets. Click Pages, then select the blue button that says Add Pages.
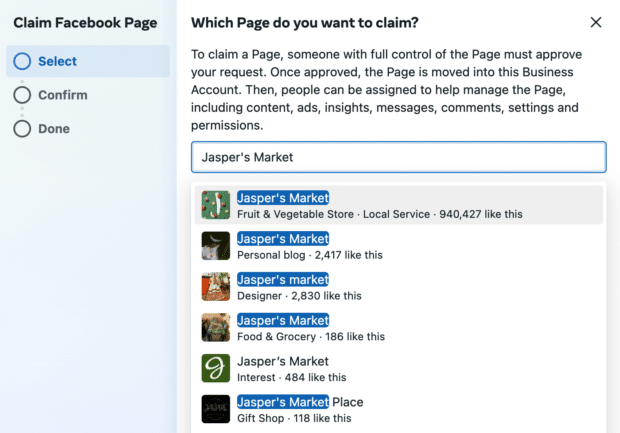
2. Next, you’ll be asked to choose between a few options. You can either create a new Facebook Page, claim an existing Facebook Page, or request to share a Facebook Page.
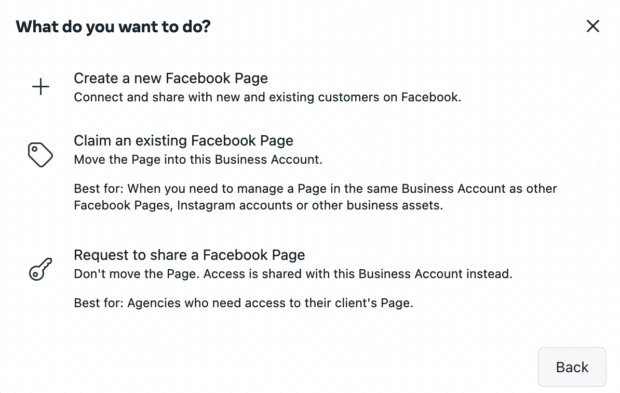
3. After you’ve selected Claim an existing Facebook Page, start typing the name of your Facebook business page in the text box. Your business page name should autocomplete below, so you can just click on it. Assuming you have administrator access to the page you’re trying to add, your request will be approved automatically.
Step 3. Add your Facebook ad account(s)
Note that once you add your ad account to Facebook Business Manager, you can’t remove it, so it’s especially important only to add accounts you own. To access a client account, click Request Access instead.
If you’re already using Facebook ads, you can link your existing ad account as follows:
- From the Business Manager dashboard, click Add Ad Account
- Click Add Ad Account again
- Finally, enter the ad account ID, which you can find in Ads Manager.
If you don’t already have a Facebook ads account, the process to add an ad account is similar to adding a Page.
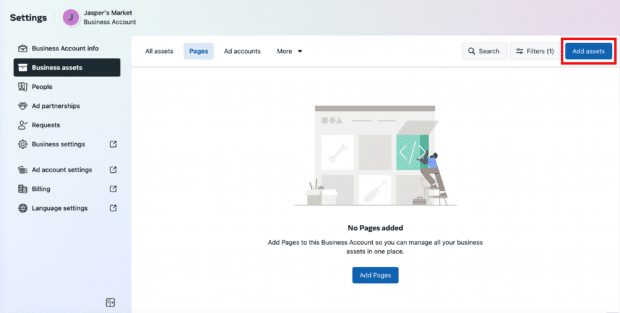
1. From the Business Manager menu, select Business assets. Once there, click on the blue button in the right hand corner that says Add assets.
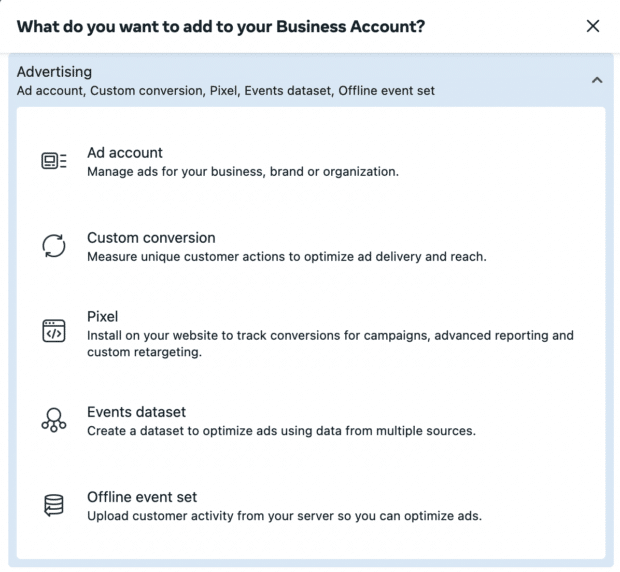
2. You’ll see several drop-down options to choose from. Select Advertising, then select Ad account.
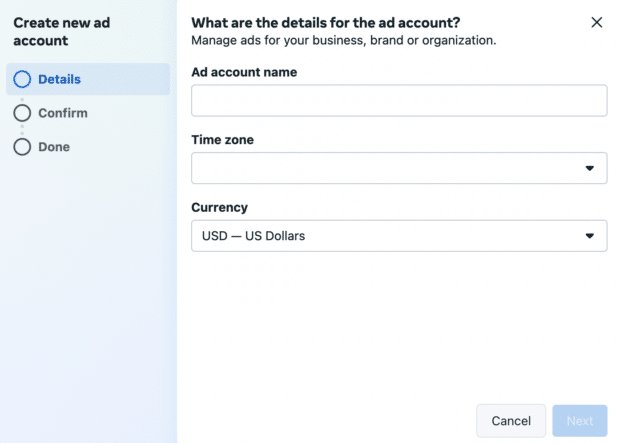
3. Select Create a new ad account. Enter the details for the ad account you want to create. These details include the ad account name, your time zone, and the currency in which you’ll pay for your ads.
Step 4. Add people to help you manage your Facebook assets
Keeping on top of your Facebook marketing can be a big job, and you may not want to do it alone. Business Manager allows you to add team members so you can have a whole group of people working on your Facebook business page and ad campaigns.
Before you add people to your account, take note of the access options you can assign.
Facebook offers three levels of access:
- Full control: Formerly called the “business admin,” this role has total control over the account’s settings, business assets, tools, and people. People with full control can also delete the account. This role is best for business owners.
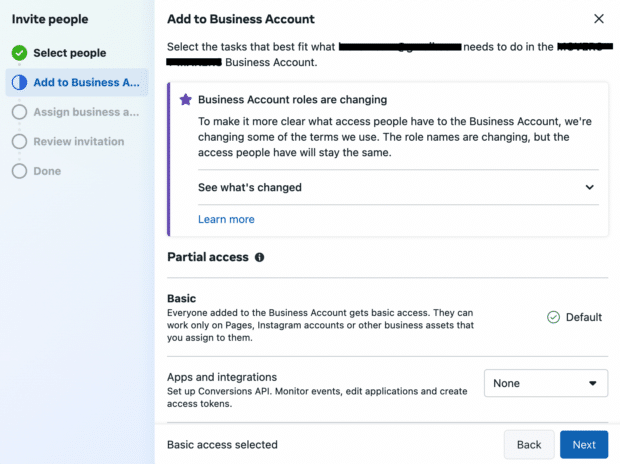
- Partial access: Best for marketing team members or external vendors, people with partial access can only work on tasks and business assets assigned to them.
- Advanced options: Adding this option to a role allows people to work on assigned tasks in addition to the access they have with full control or partial access. This role is meant for people who may need access to financial information (previously the finance editor or finance analyst roles).
Once you know which roles are available, here’s how to set up your team.
1. From the Business Manager menu, select People. Once there, click on the blue button in the right hand corner that says Add People.
2. Enter the business email address of a team member you want to add. This might include employees, freelance contractors, or business partners. In this step, you are specifically adding individuals rather than an agency or another business (you can do that in the next step).
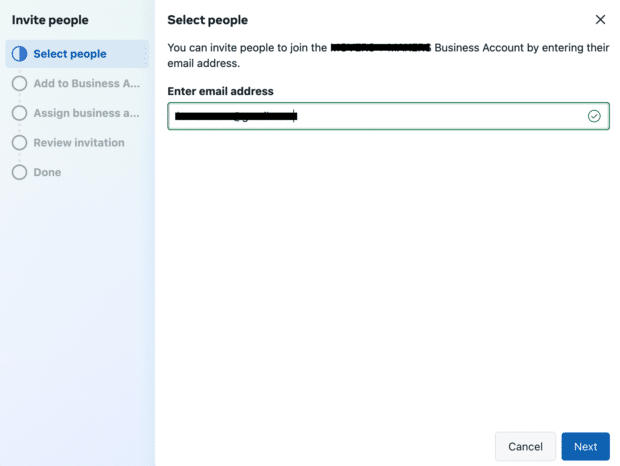
3. Next, select the access you want to give them. You can decide whether to give these individuals basic account access (choose Partial access) or full access (choose Full control).
Note: Facebook recommends limiting full control to only a few people.
You can get more specific in the next stage. Make sure to add people using their work email addresses. Then click Next.
4. Next, select which business assets you want to give that person access to. The dropdown menu will display all of the Facebook Pages and Instagram accounts under your business account.
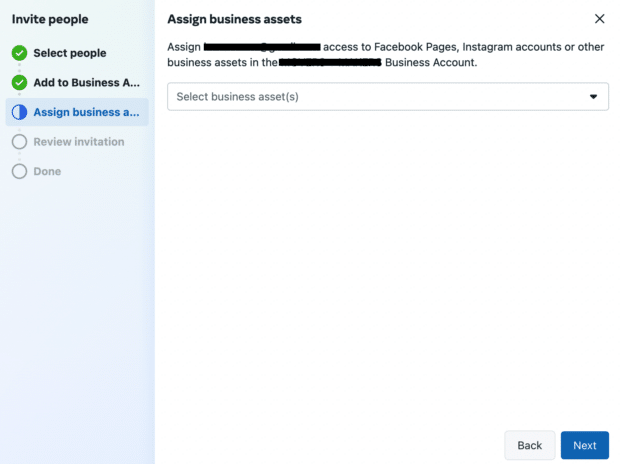
You’ll have a chance to review the invitation before you send it and they can confirm. Once you’re finished, you can add more people to your team if needed.
Note: A Facebook ad account can have up to 25 people associated with the account. After that, you’ll need to remove team members in order to add more.
If someone with access leaves your company or switches to a different role, you can revoke their permissions. Here’s how:
- From your Business Manager dashboard, click People in the left menu.
- Click on the name of the appropriate person. To edit a person’s role or remove them from your team, click the three dots in the right corner.
- Select whether you want to edit their account info, edit their business permissions, or remove them from the business account.
Step 5: Connect your business partners or ad agency
This might not apply to you if you’re just getting started with Facebook advertising, but you can always come back to this step later.
Business Settings
2. In the left menu, click Partners. Under Partner to share assets with, click Add.
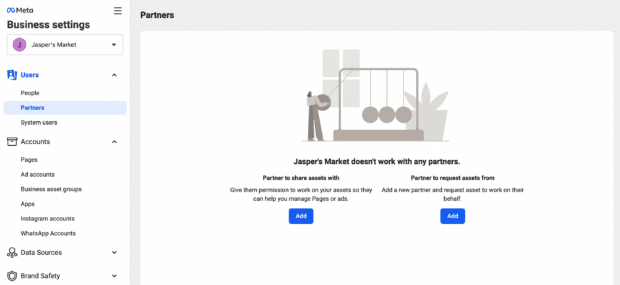
3. Your partner must have an existing Business Manager ID. Ask them to provide it to you. They can find it in their own Business Manager under Business Settings>Business Info. Enter the ID and click Add.
The business you’ve just added can manage permissions for the individuals on their own teams from their own Facebook Business Manager account. That means you don’t need to worry about assigning and managing permissions for all the individual people who service your account at your agency or partner company, just the partner company itself.
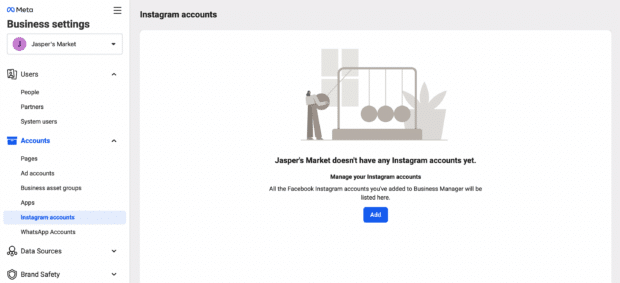
Step 6: Add your Instagram account
Now that you’ve got your Facebook assets set up, you can connect your Instagram account to Meta Business Manager as well.
1. From your Business Manager dashboard, click Business Settings.
2. In the left column, click Instagram accounts, then click Add. In the pop-up box, enter your Instagram login information and click Log In to connect your account.
Step 7: Set up Meta Pixels
What’s a Meta Pixel? Put simply, it’s a small bit of code that Facebook generates for you. When you place this code on your website, it gives you access to information that will allow you to track conversions, optimize Facebook ads, build targeted audiences for your ads, and remarket to leads.
We recommend setting up your Facebook pixel right away, even if you’re not ready to start your first ad campaign yet. The information it provides now will be valuable when you are ready to start advertising.
Our complete guide to using Meta pixels is a great resource that walks you through everything you need to know about making the best use of the information a Facebook pixel can provide. For now, let’s get your pixel set up from within Meta Business Manager.
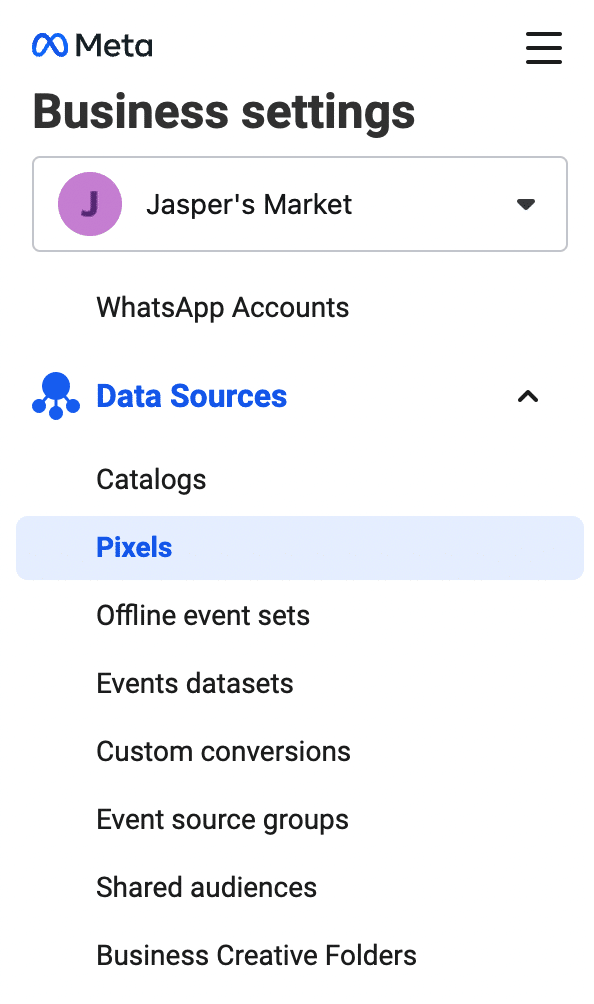
1. From your Business Manager dashboard, click Business Settings.
2. In the left column, expand the Data Sources menu and click Pixels, then click Add.
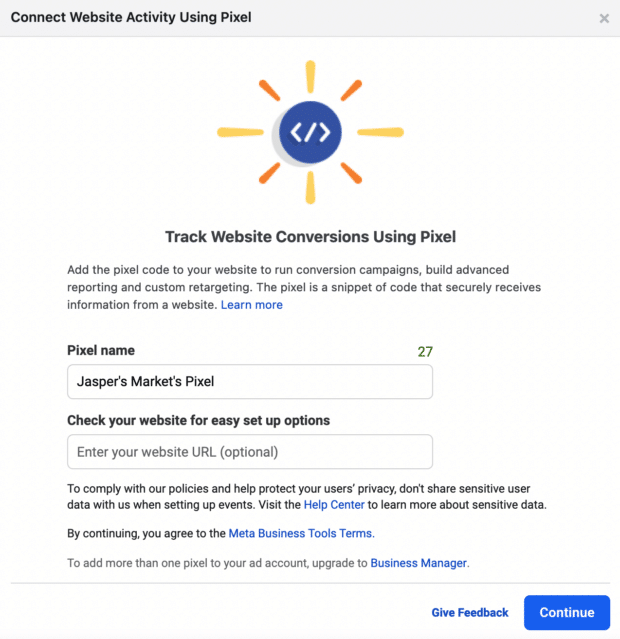
3. Enter a name (up to 50 characters) for your pixel. Enter your website so Facebook can provide the best recommendations for how to set up your pixel, then click Continue. When you click Continue, you are agreeing to the Pixel terms and conditions, so you should read those before you go any further.
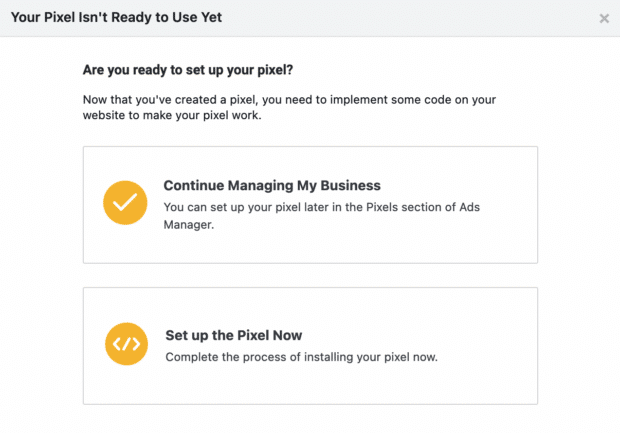
4. Click Set up the Pixel Now.
5. Follow the detailed instructions in our Meta pixel guide to get the pixel set up on your website and start collecting data.
You can create up to 100 pixels with your Meta Business Manager account.
Step 8. Increase security on your account
One of the advantages of using Meta Business Manager is that it offers extra security for all of your business assets.
1. From the Business Manager dashboard, click Business Settings.
2. In the left menu, click Security Center.
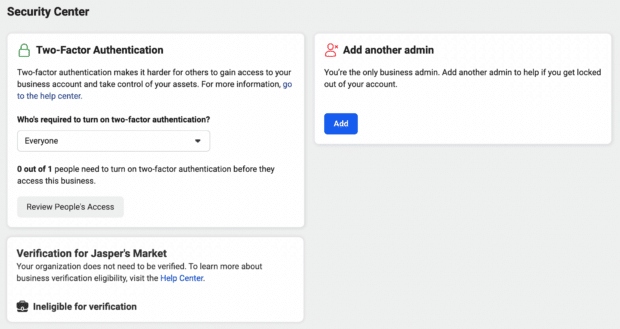
3. Set up two-factor authentication. Setting it as required for Everyone offers the highest security.
How to create your first campaign in Meta Business Manager
Now that your account is set up and your pixels are in place, it’s time to launch your first Facebook ad.
Step 9: Place your first ad
We’ve got a full guide that explains the strategy and specific details you need to know to create compelling and effective Facebook ads. So here, we’ll just walk you through the steps you need to take to get an ad up and running in Business Manager.
1. From your Business Manager dashboard, click Ads in the left column.
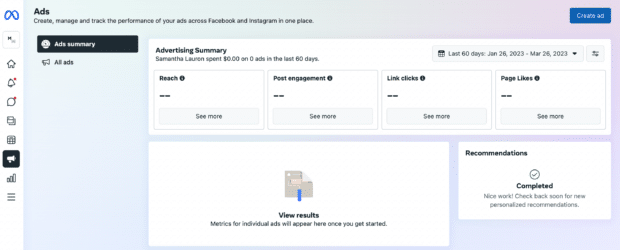
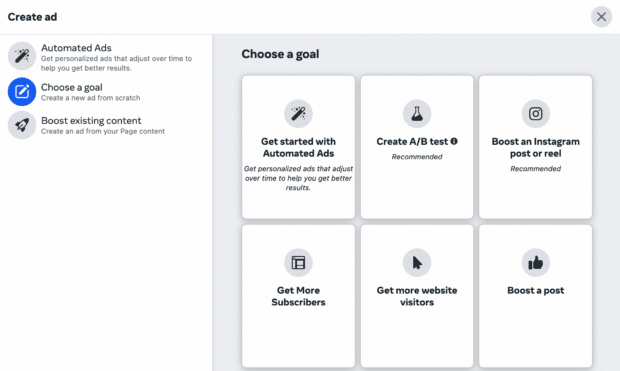
2. This will take you to your ads dashboard where you’ll see an overview of metrics from recent ads. To create a new ad, click the blue Create ad button in the top right corner.
3. Choose your goal, target your audience, set your budget and schedule, and choose your specific ad types and placements. You also have the option to boost existing content or get personalized suggestions with Automated Ads.
Frequently asked questions about Meta Business Manager
What is Facebook Business Manager called now?
Facebook Business Manager is now called Meta Business Manager. The platform is part of the Meta Business Suite which is used to manage all of your brand’s Facebook and Instagram accounts in one place.
How do I use Meta Business Manager?
To set up your Meta Business Manager, you need to have a Facebook Business account. Setting up your Meta Business Manager account is free and can be done in a few steps. After you create your Business Manager account, you can use it to manage Facebook ads, organize marketing assets, and share access with team members.
Does Meta Business Manager cost money?
Meta Business Manager is a free platform. Anyone with a Facebook Business account can set up Meta Business Manager to manage Facebook advertising and organize brand assets.
Get the most out of your Facebook ad budget and save time with Hootsuite. From a single dashboard you can manage ad campaigns and organic content across multiple networks. Try it free today!