
You’ve probably already pored over our Must-Try Instagram Hacks. (It’s a fun beach read, I totally get it!) Now, it’s time to master the fine art of the Instagram Story.
It’s just basic math: If a picture is worth a thousand words, an Instagram Story post must be worth a million, right?
And these Instagram Story hacks will make you the best Story-teller in town.
Get your free pack of 72 customizable Instagram Stories templates now. Save time and look professional while promoting your brand in style.
Top Instagram Story hacks for 2025
500 million people use Instagram Stories every day. And this year, there are more features for businesses to take advantage of than ever before.
Some might say there are almost too many features.
Which is why we’ve narrowed down our favorite hacks and little-known features to 30. These are the most time-saving tricks that will make you look like a pro on Stories and ensure you use the platform to its full advantage.
General Instagram Story hacks
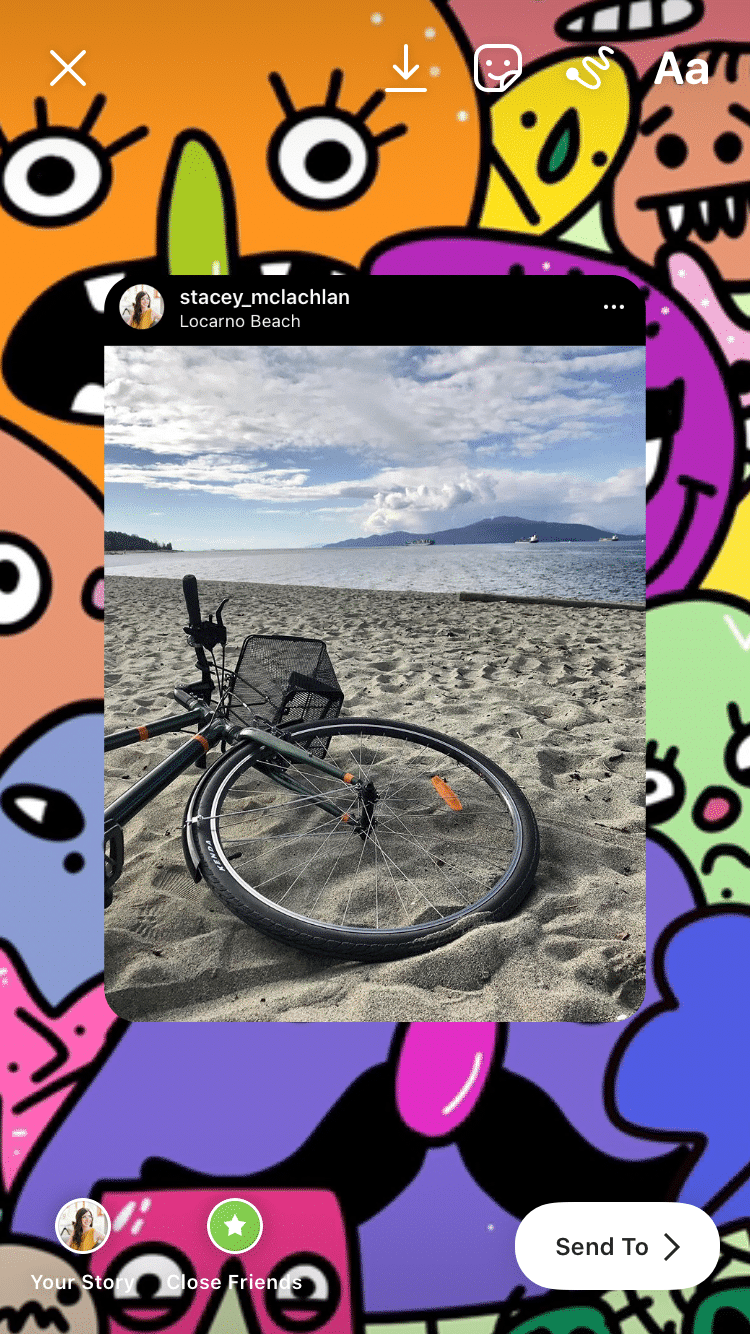
1. Create a patterned backdrop for sharing a feed post
Is adding a custom backdrop necessary when you share a feed post on your Story? Goodness, no. But like wearing lipstick to a Zoom meeting, sometimes it’s just nice to add some pizazz to something routine.
How to do it:
- Find the feed post that you’d like to share and screenshot it, cropping so it’s just the post.
- Next, click the paper airplane icon on that original feed post and select “Add post to your Story.”
- Stretch the feed post to fill the whole screen—this seems wild, I know, but this will make the final post into a tappable link to the original post.
- Next, open your camera roll and add in the background pattern of your choice.
- Then, paste in the cropped screenshot of your post on top and arrange or resize as you’d like.
- Upload the whole thing.
2. Fill the background with a solid color
The default gradient backgrounds are nice and all, but sometimes, you’ve got something to say that can only be framed by a wall of blinding chartreuse.
How to do it:
- Tap the draw icon.
- Select a color from the palette (tip: swipe right to see additional color options, or press and hold down on any particular color to open up a rainbow gradient of choices).
- Once you’ve chosen a color, press anywhere on the image or text part of the screen and hold two or three seconds to fill

3. Uncover even more colors! More!
You’re greedy, but we’re not judging. You actually have access to every color of the rainbow and then some with Instagram Stories. Find your specific brand hues, or get funky with a questionable shade of puce.
How to do it:
- Open Instagram Stories and select the brush tool.
- Tap and hold any of the default color circles. This will open a color slider.
- Explore the slider to find the custom color of your dreams!
Alternatively, drop an image into your Story and use the eyedropper tool to grab the exact matching shade.

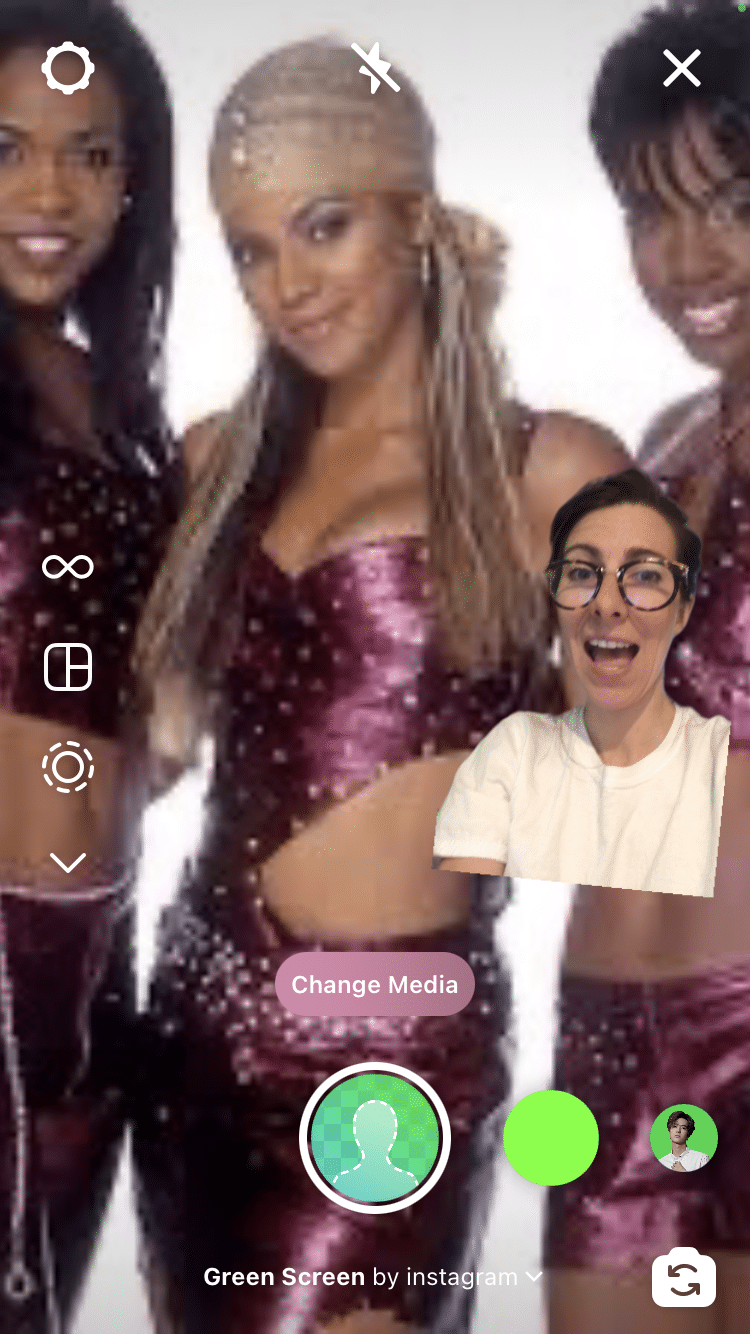
4. Use a green screen in your Instagram Story
Green screen technology has been a gamechanger for social media. You can be anywhere and everywhere. Including the moon. Especially the moon.
How to do it:
- Scroll right through the filters at the bottom of the screen to get to the magnifying glass; tap to search.
- Search “green screen” and select Instagram’s green screen filter.
- Tap Add media to choose your background video or photo from your phone’s image gallery.
- Take a picture or make a video in front of this fake backdrop.
Instagram’s teleport feature is also fun — it uses the greenscreen backdrop, but the backdrop only appears when you move your device so you can create a fun reveal effect. (You’re in your bedroom… and then you’re on tour with Destiny’s Child! Yowza!)
5. Share with a select group of VIPs
Now that your boss and your Uncle Steve and your strata council president are all following you on Insta, the pressure to be a professional employee/niece/neighbor can really put a damper on your best, stupidest Instagram thoughts.
Instagram’s Close Friends feature is a chance to share more intimate, exclusive content to a select group (sorry, Uncle Steve!). For businesses, maybe it’s a way to offer some special treatment to members or VIPs (which, again, probably does not include Uncle Steve).
How to do it:
- Go to your Instagram profile, click the three lines in the top corner.
- Select Close Friends.
- Search for your BFFs and click Add (there’s no limit right now on how many people this can include).
- To remove people, click on Your List and hit the remove button (don’t worry, they won’t be notified if they’re cut).
- Now, when you go to post a Story, the option to share to Close Friends will be at the bottom of the screen next to Your Story.
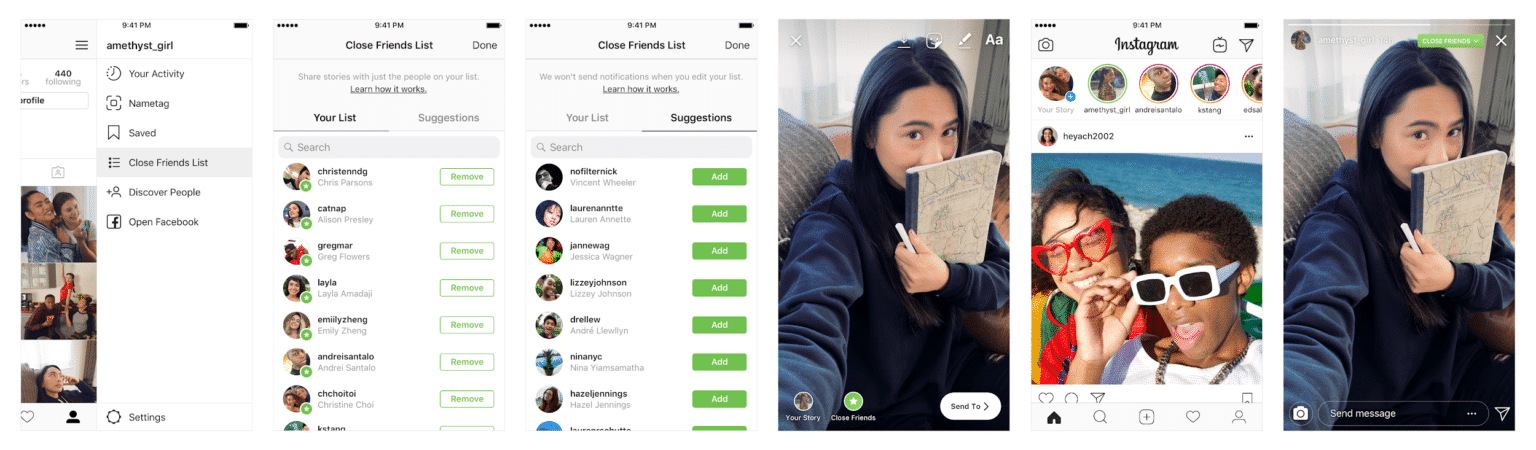
Source: Instagram
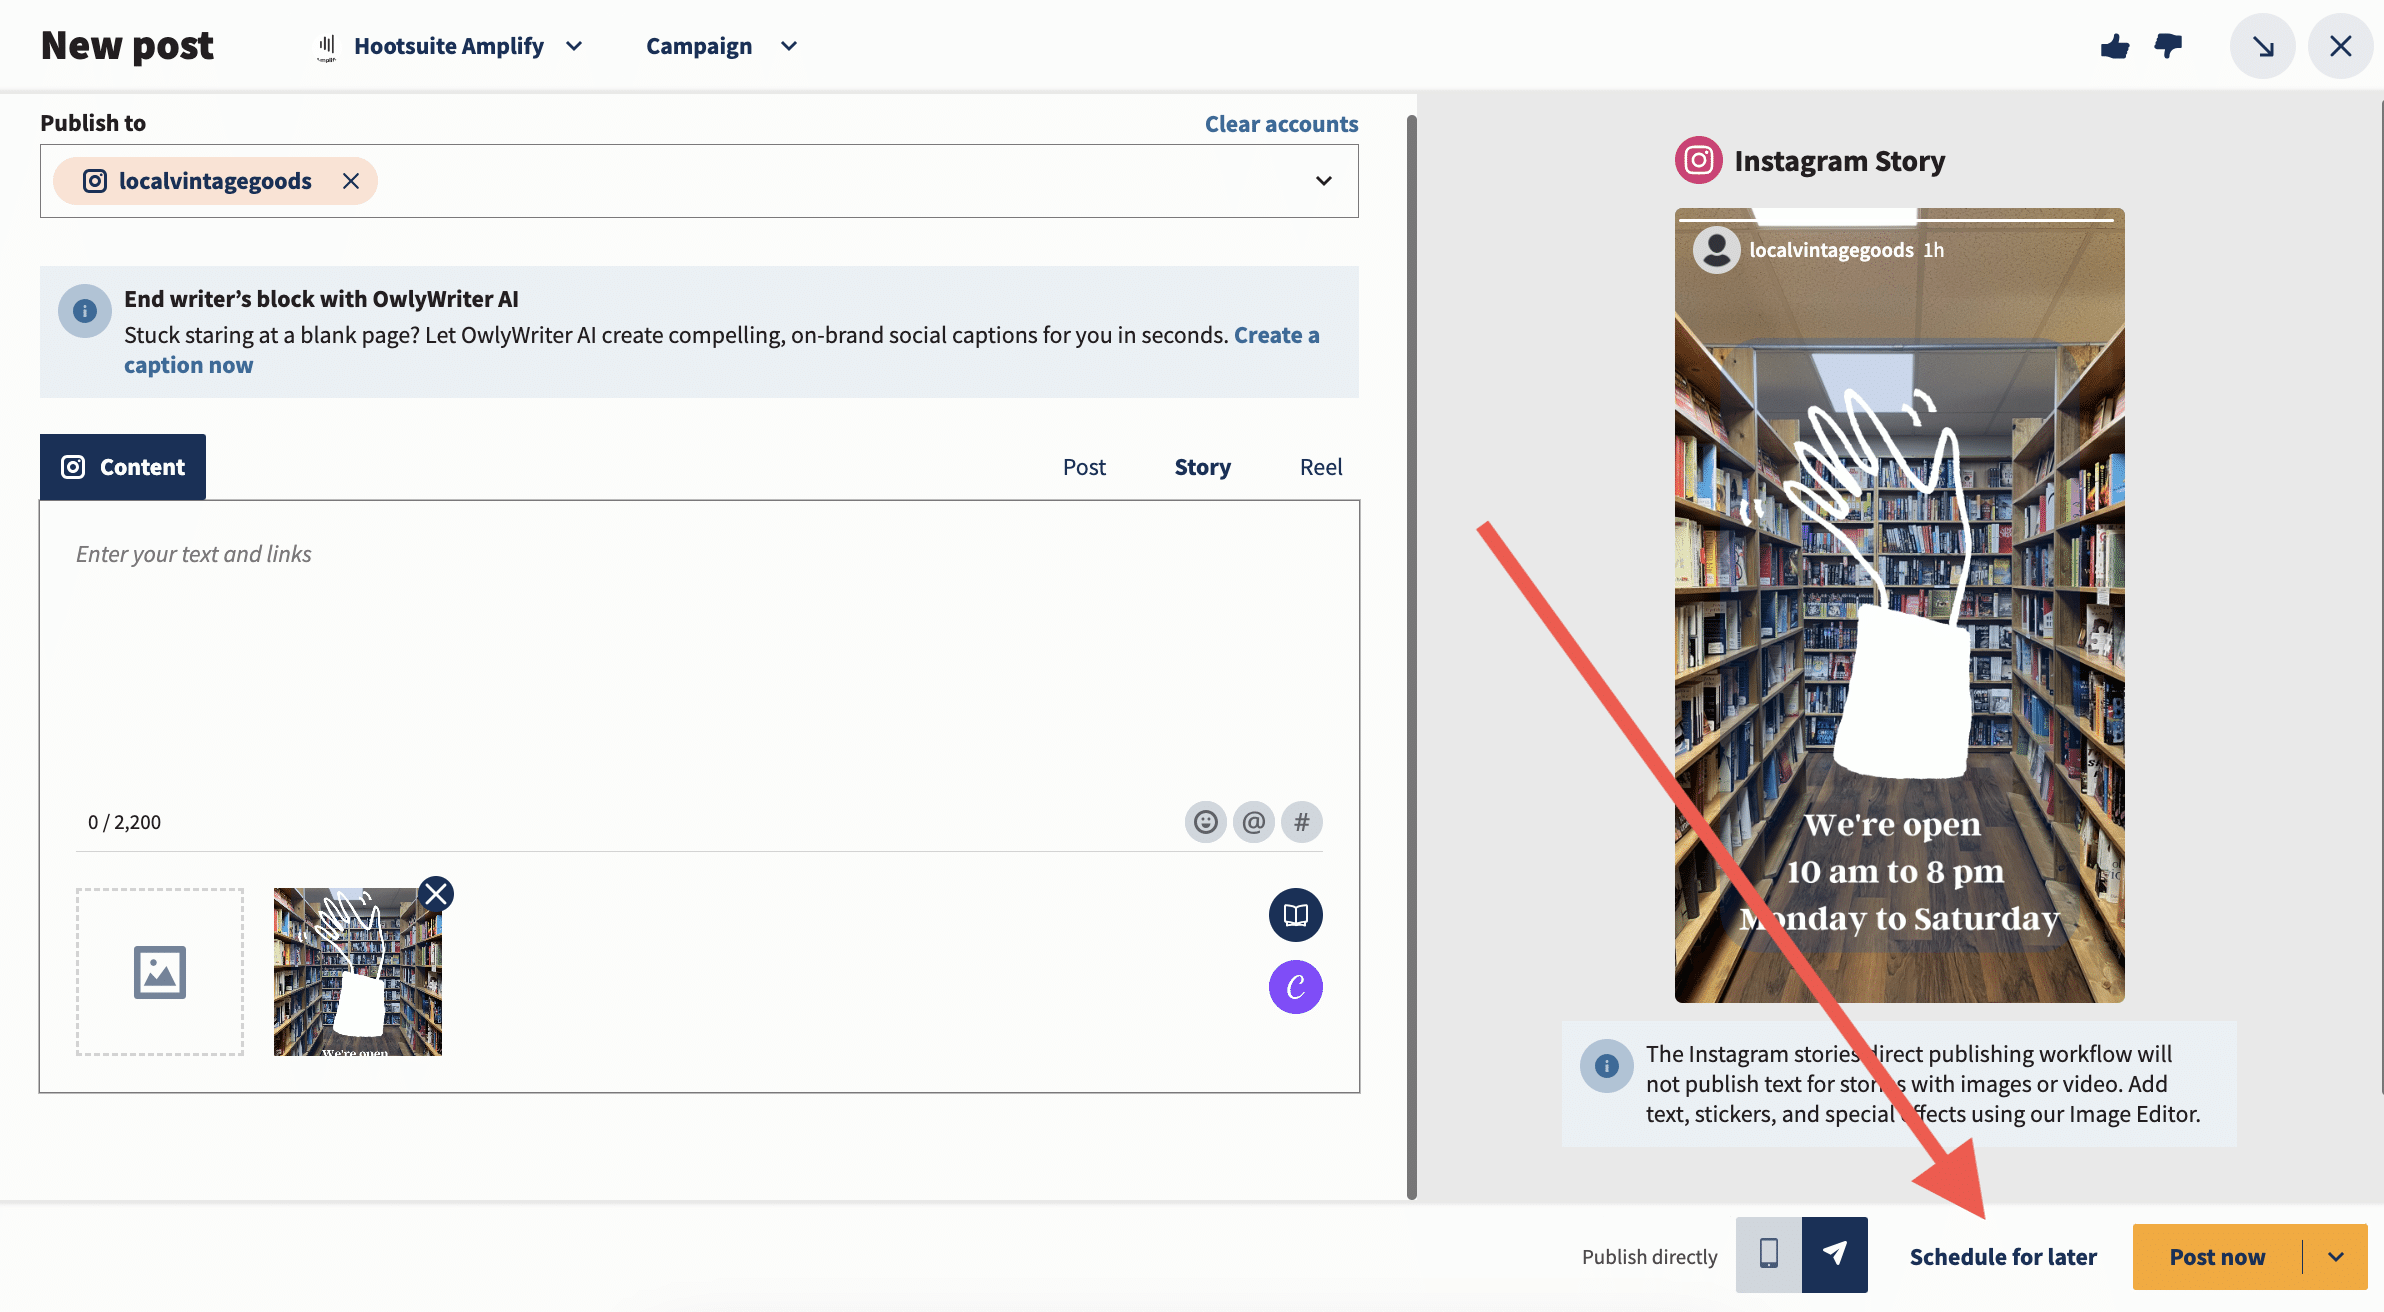
6. Schedule your Instagram Stories in advance
We know Stories are supposed to be a spontaneous medium. But are you really at your desk or on your phone all day? No! You’re living life so that you have something to make Instagram Stories about.
You actually can’t schedule Stories directly in the Instagram app… but you very much can schedule them with Hootsuite.
How to do it: Check out our step-by-step guide to scheduling your Stories with the Hootsuite schedule.
7. Add a layer of translucent color to a video or photo
Maybe you see life through rose-colored glasses, and want other people to, too. No sweat: just use this quick trick for colorizing your images or videos.
How to do it:
- Upload or shoot your video or photo.
- Tap the marker icon on the top of the screen.
- Select the highlighter icon at the top of the screen.
- Choose your preferred color from the bottom of the screen.
- Tap and hold the photo until a layer of translucent color appears over top.

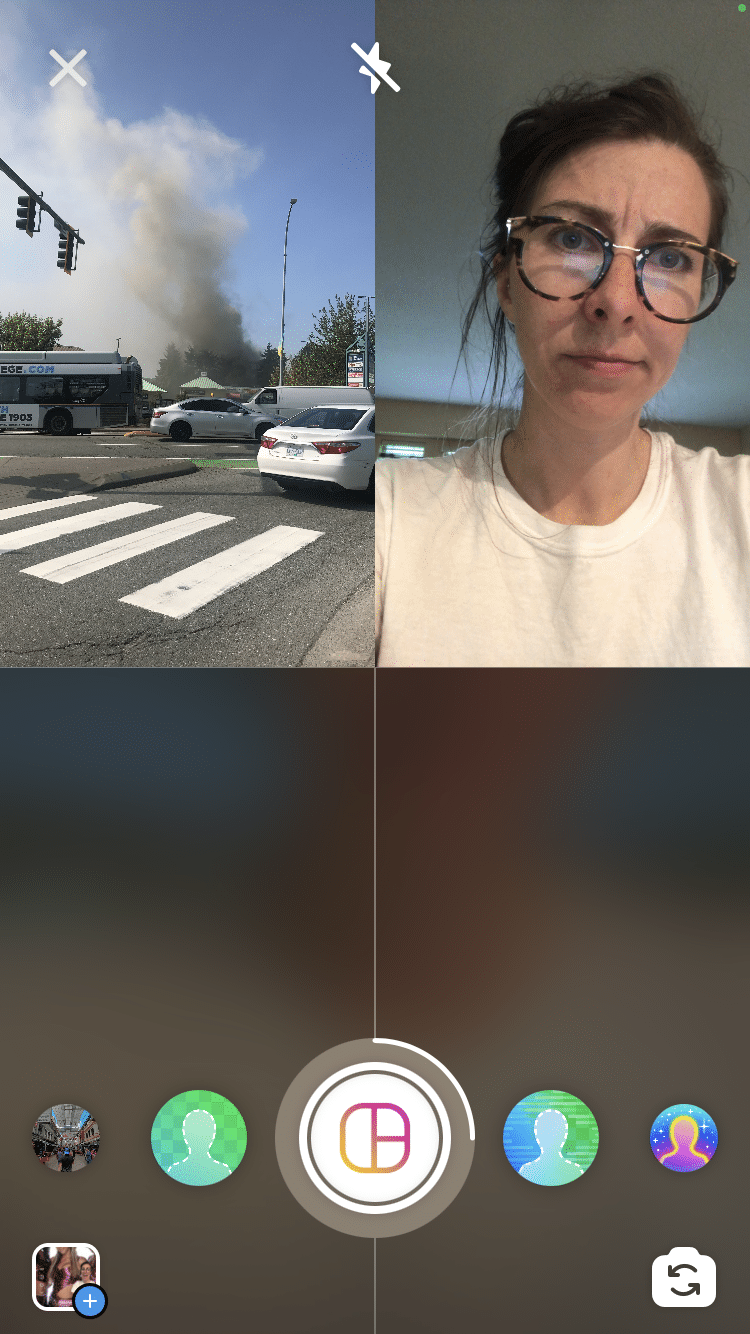
8. Post multiple Stories at once
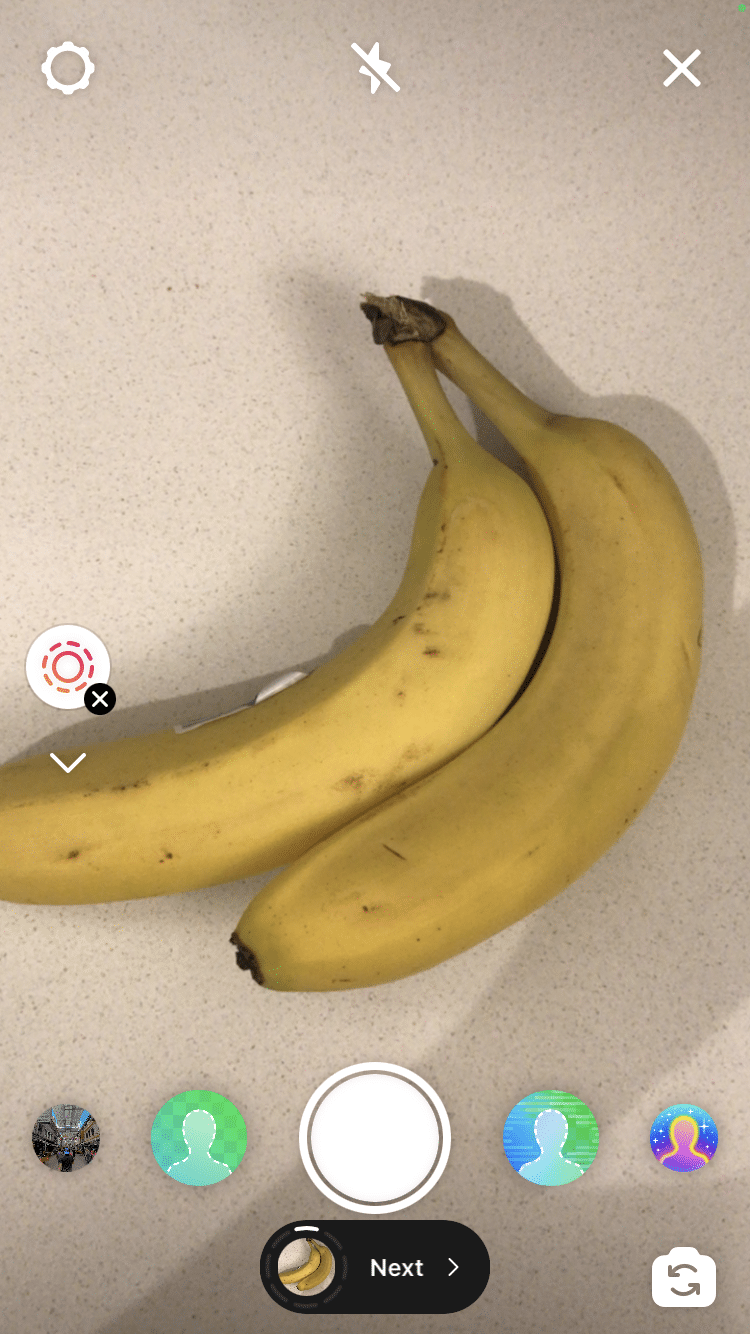
It can take some time to properly prepare, edit or curate a multi-part Story, as any social media savant knows. But maybe you don’t want to leave your followers hanging as you search out the perfect background color or combination of stickers for Part 2 of your series on your local boat show. The solution is to prep multiple Story posts to all post at once (in the order you choose, of course) using Instagram’s Multi-capture tool.
How to do it:
- Open Instagram Stories and scroll down to find the Multi-capture tool (a circle surrounded by another circle made of dashes).
- Take a photo (note: you can’t upload pics or create video in this mode). You’ll see your snap added to a little circle in the bottom left-hand corner or the bottom of the screen.
- Take up to 9 additional photos, for a total of 10. Each will be the foundation of a separate Story post.
- When you’re done, tap on the little circle icon (in the left-hand corner, if you’re using a filter, or at the bottom of the screen if not) to move to the editing screen.
- Here, you can take your sweet time adding text, stickers, music, or effects to each photo.
- Ready to post? Tap Next.
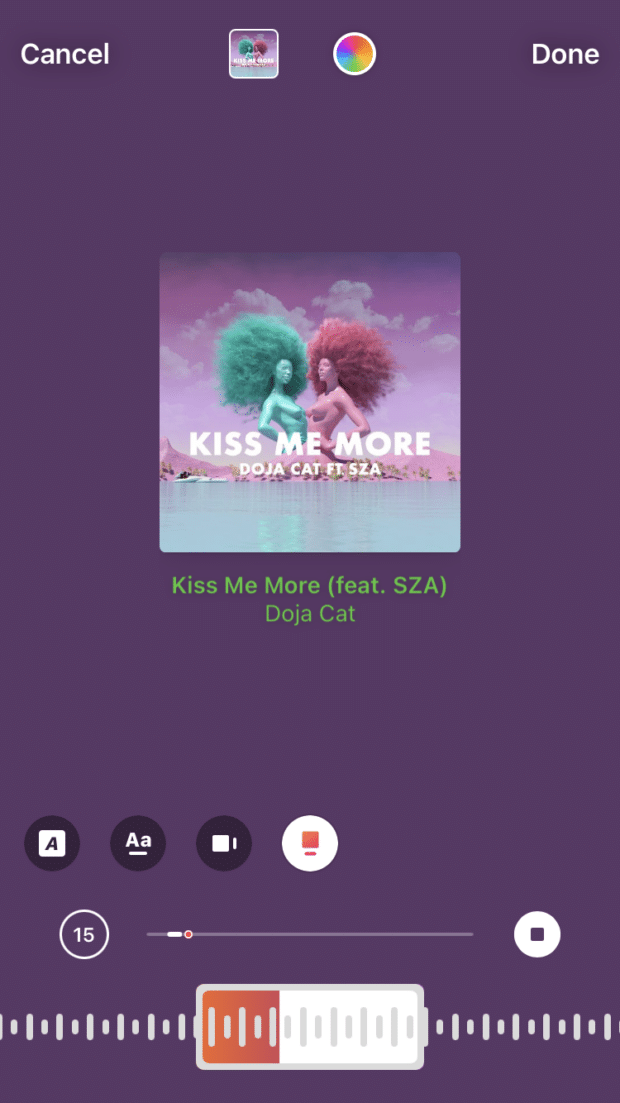
9. Add music to your Instagram Story
Your Story needs a soundtrack! Needs it.
How to do it:
- Record your video, take your picture or upload your content.
- On the edit screen, tap the music note icon on the top of the screen.
- Select your song.
- On the editing screen, you have a few options to customize how the music is presented or visualized:
- On the bottom, scroll between options to showcase the lyrics or the album cover.
- At the top of the screen, tap the color wheel to change the color of any text.
- Tap the number in a circle to adjust the duration of the clip.
- At the very bottom of the screen, scroll to select the portion of the song you’d like to play.
- Back on the edit screen, pinch or expand to make the album cover or lyrics bigger or smaller. (Tip: if you don’t want them to appear at all, shrink that element as far down as you can and put a sticker over top!)

Instagram Story photo hacks
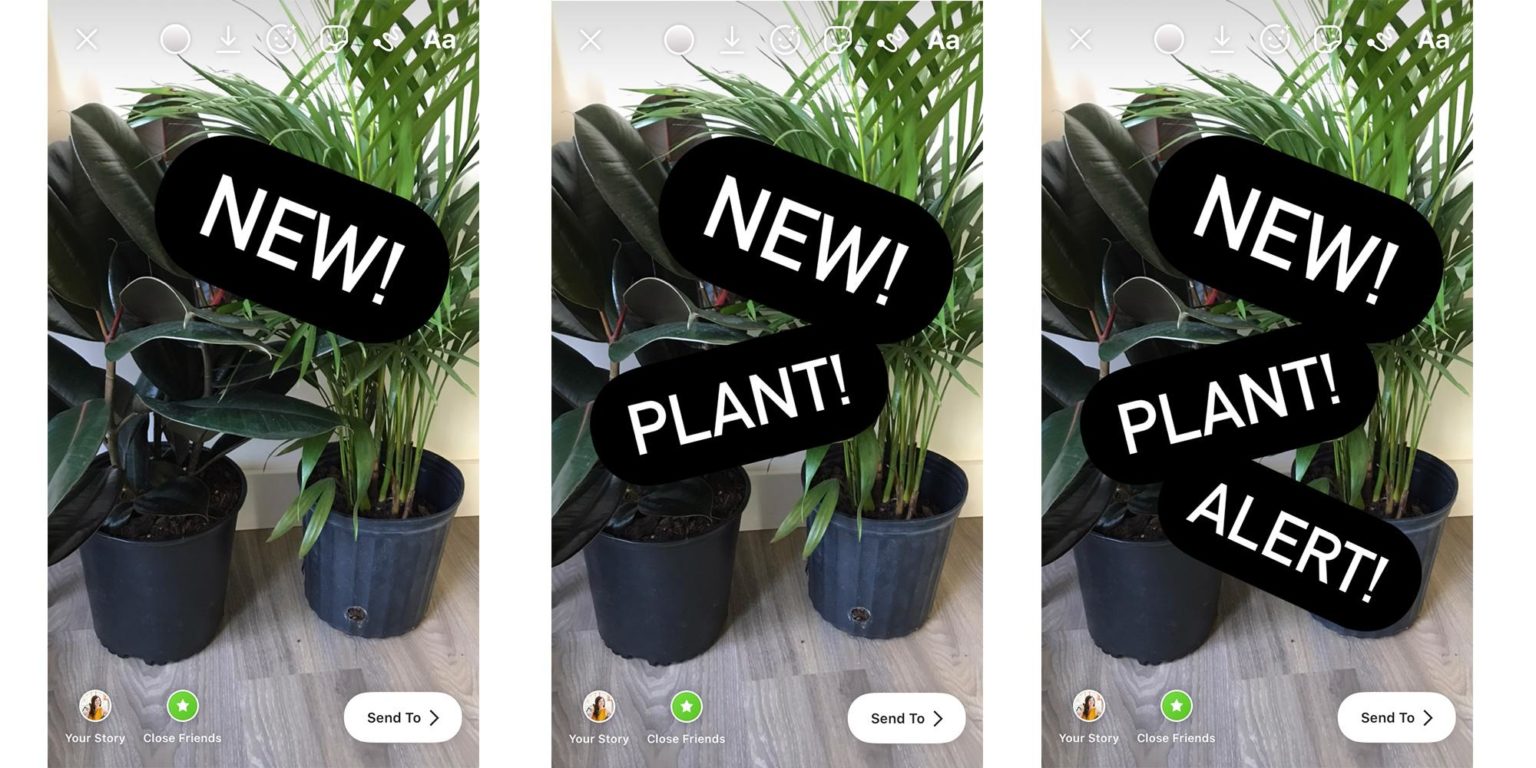
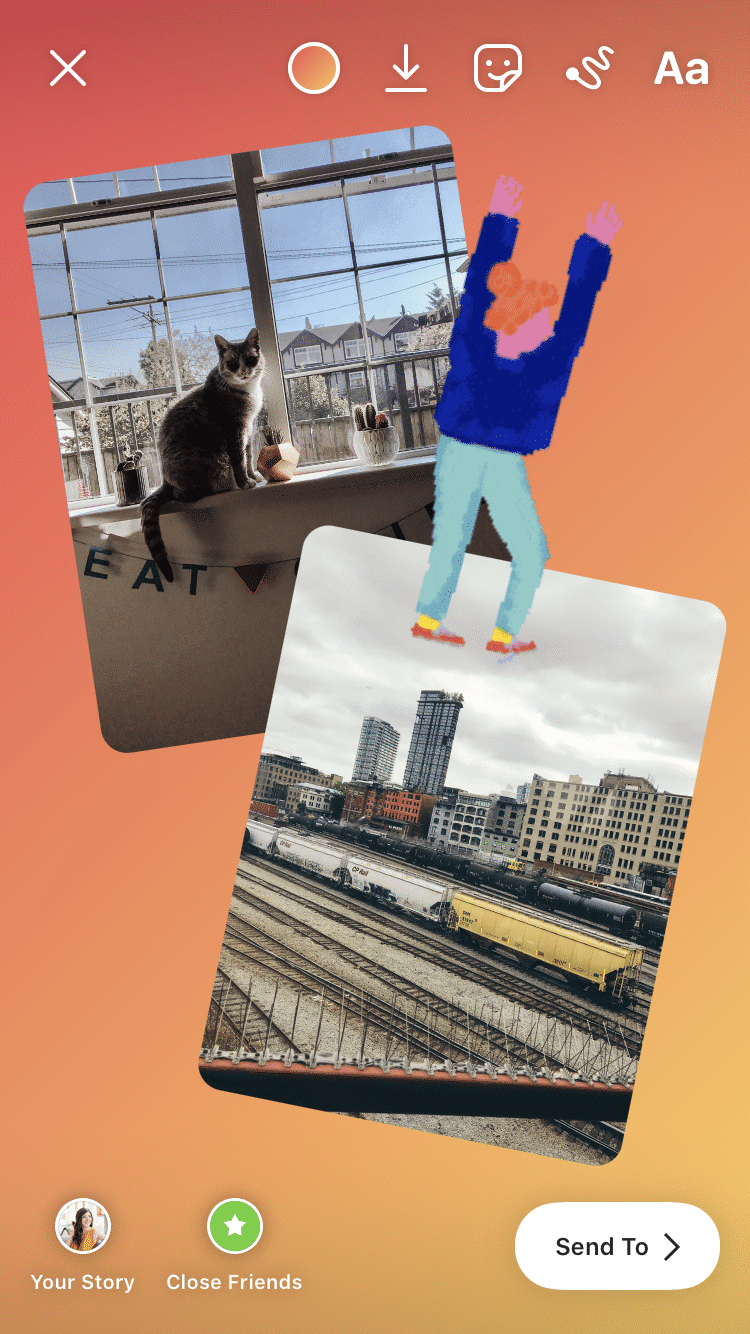
10. Create “progression” posts that build on an image
Build the drama over several Story posts, by adding new elements to the same base image. Oooh, the suspense!
How to do it:
- Craft a Story post as usual with video, photos, text, stickers or drawings.
- Before you upload it, click the save icon (a downward-facing arrow above a line) at the top to download your composition to your camera roll (if you’ve added any gifs or music, this will save as a video).
- Upload your Story by clicking the Send To button on the bottom right corner.
- Next, start a new Story.
- Select Create, then go to your camera roll and select that first Story you’ve saved.
- Now, you can seamlessly build on top of that first Story with additional elements.
- Save this new creation to your camera roll.
- Repeat as necessary.
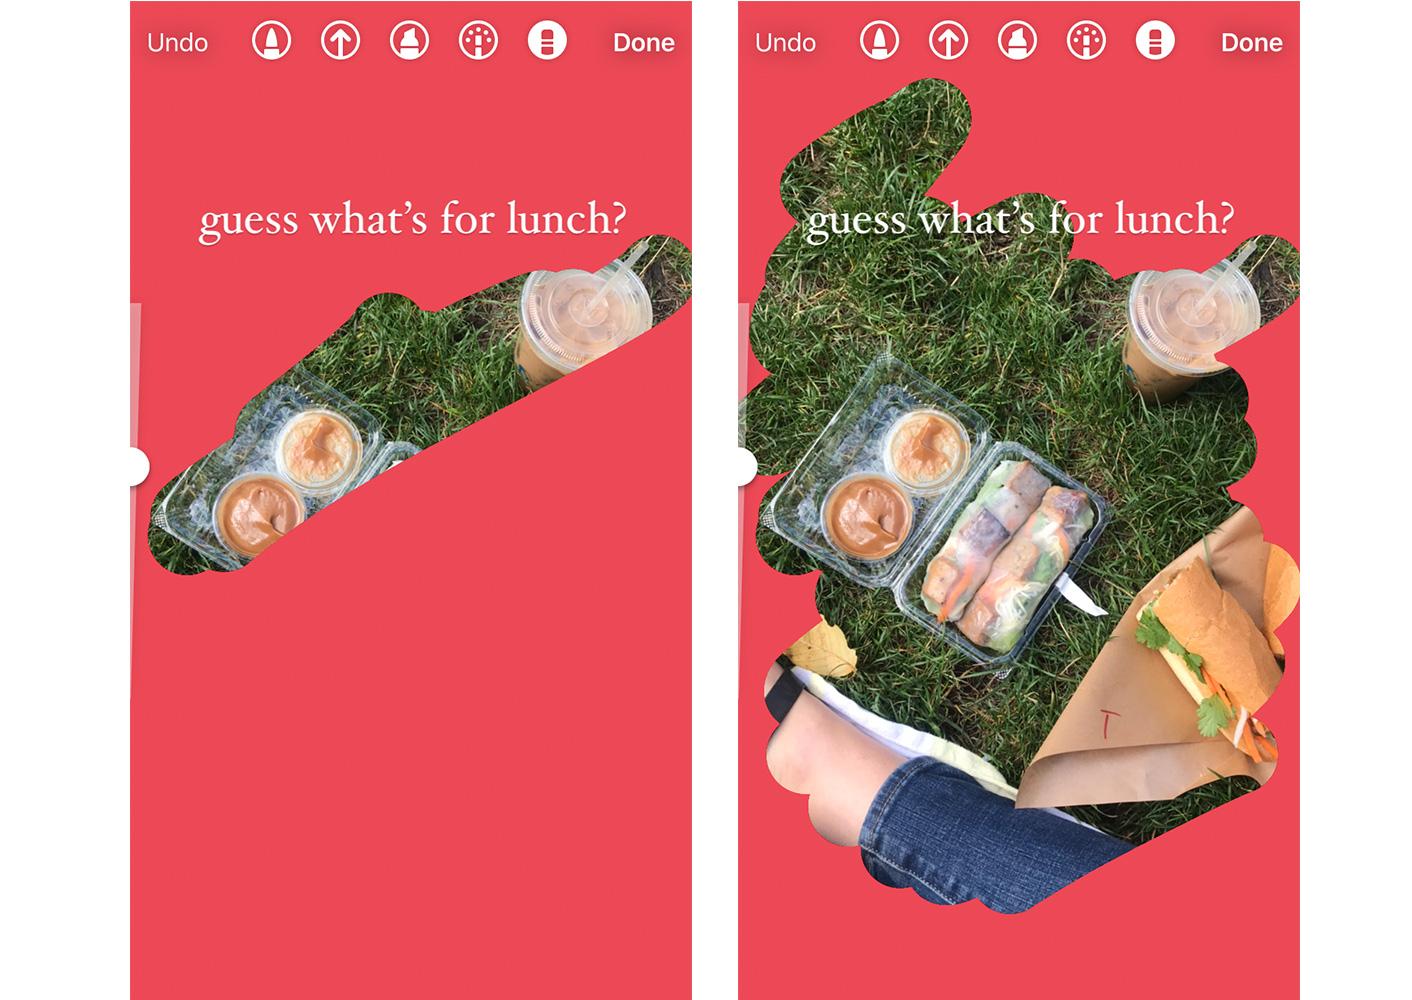
11. Create a “revealing” Story series
Uncover a mystery image with the help of the eraser tool. This next hack involves skills from trick #3 and #7, above. Hope you’ve done your homework because this is absolutely a test.
How to do it:
- Add an image in create mode.
- Now fill the screen with color (see trick #3!).
- Select the eraser tool.
- Erase a bit of the color layer to reveal a small sliver of your image underneath.
- Hit the save button to download this to your camera roll… but do not upload it yet.
- Uncover some more of the image by continuing to erase the color layer, hitting the save button at various stages to capture the reveal step-by-step.
- When you’re done collecting all of these images, start a fresh Story post and upload that very first image.
- Post the next saved images one by one so that followers will see the image being uncovered in stages.
12. Create cool effects with the eraser tool
A few strategic swipes of the eraser can create the illusion of photo and other elements merging into one. Harmonious! Inspiring! Is this… art?
How to do it:
- Open the photo you’d like to use.
- Use the marker tool (we like neon) to create a visual element that overlaps the central object of your photo.
- Now, use the eraser tool to erase any marker bits that overlap with the main photo object. It’ll look like the drawn bits are weaving around it. An optical illusion!

13. Compose a multi-image Story
The more images, the merrier! Use the paste tool to throw as many photos into a Story as you’d like. Who would dare stop you?!
How to do it:
- Open your camera roll and select a photo.
- Tap the share icon, and click copy photo.
- Back in the Instagram app, click in a text box and select paste.
- Repeat to pile on the pics.
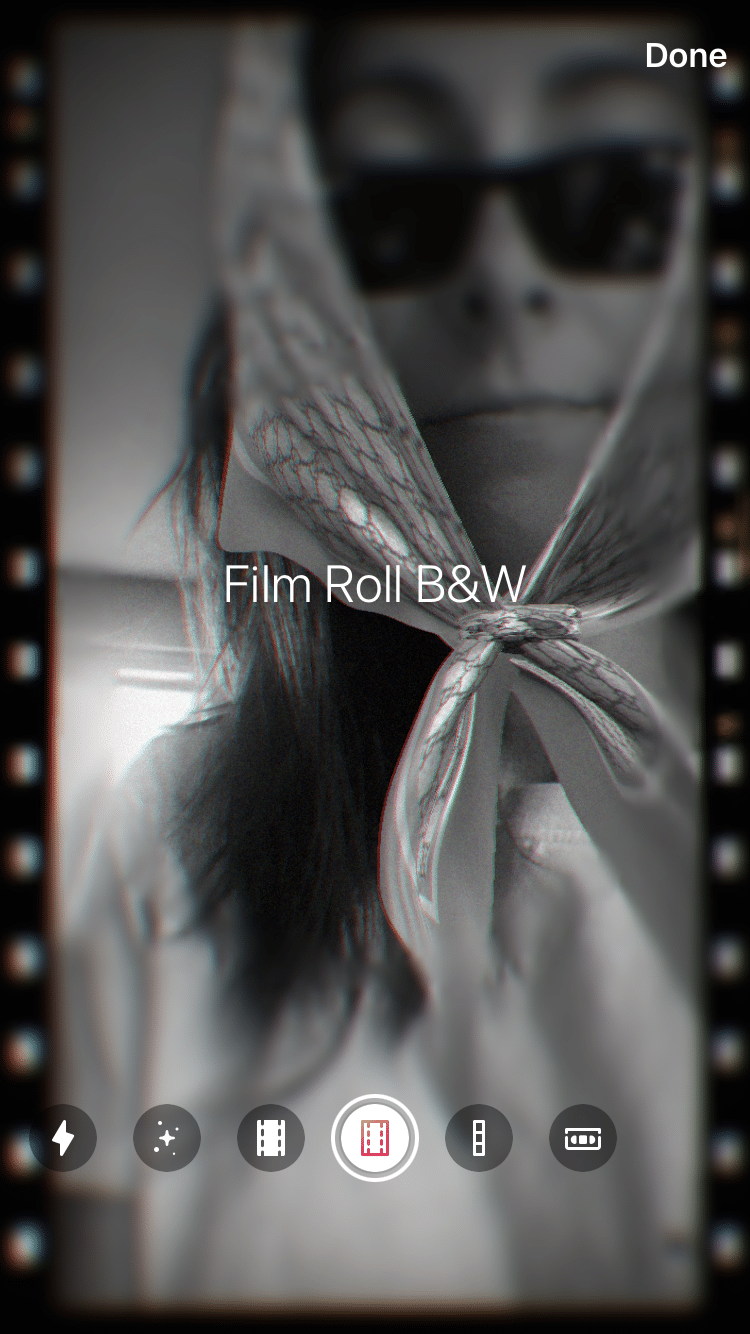
14. Use Instagram’s photobooth feature
You’re a model, baby! Instagram’s new Photobooth feature will take four snaps in a row, which you can then showcase in a variety of dynamic formats. (There are a lot of flashing camera bulbs, we’ll warn you right now.)
How to do it:
- Open Instagram Stories and scroll down to find the Photobooth tool (an icon that looks like a pile of photos).
- Choose a filter if you’d like, and then hit the shutter button. You’ll get a 3-2-1 countdown for each of four shots.
- In the preview screen, you can add music (“Covergirl” by RuPaul is the only correct choice, btw) or click the Photobooth icon again at the top to choose from a few different formats — like film roll, which looks like vintage film.
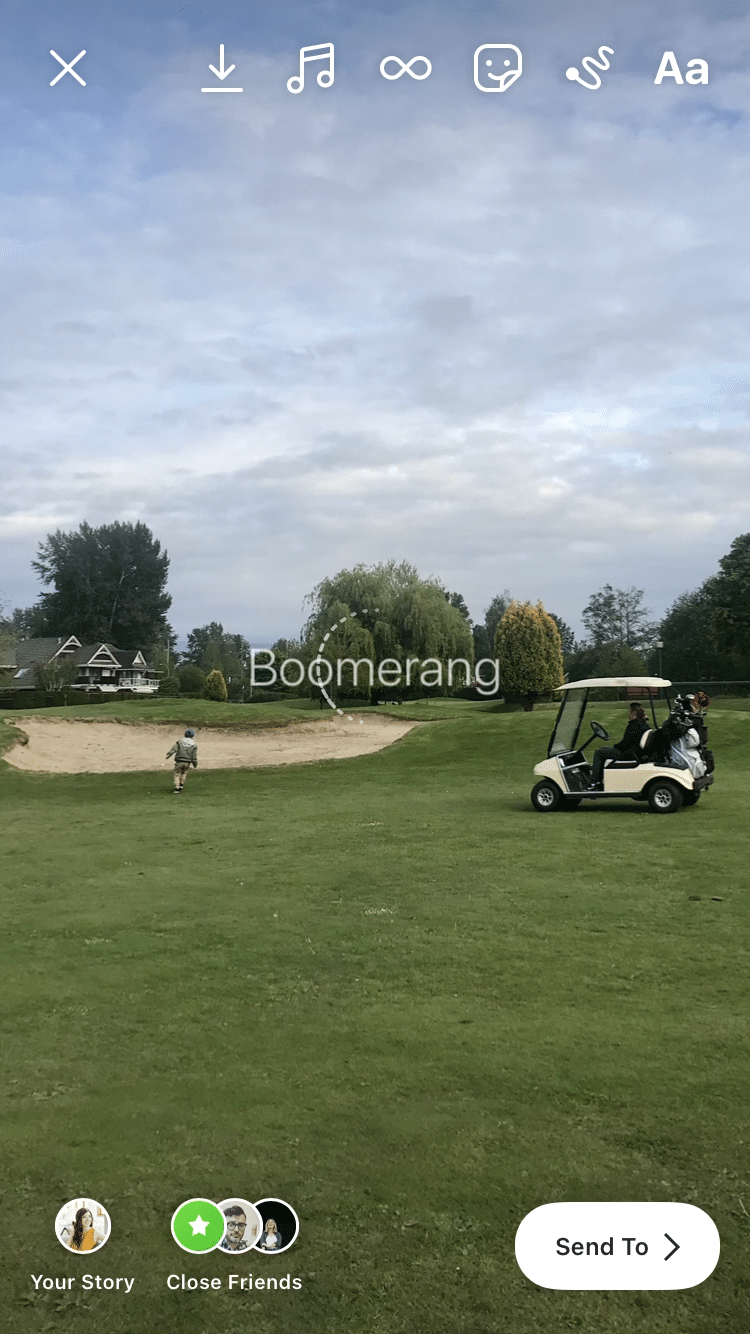
15. Create Boomerangs from your live photos
Did you snap a moment with your iPhone that you want to relive again — and then relive again backwards? And then forwards? And then backwards again?
If you’ve taken the photo as a Live photo, it’s possible. (If you’re not sure how to take a Live photo in the first place, just open your camera app and tap on the concentric circles at the top!)
How to do it:
- Open Instagram Stories and swipe up to view your photo gallery.
- Pick a live photo from your camera roll.
- Hold down on the photo until the word “Boomerang” appears.
Instagram Story text hacks
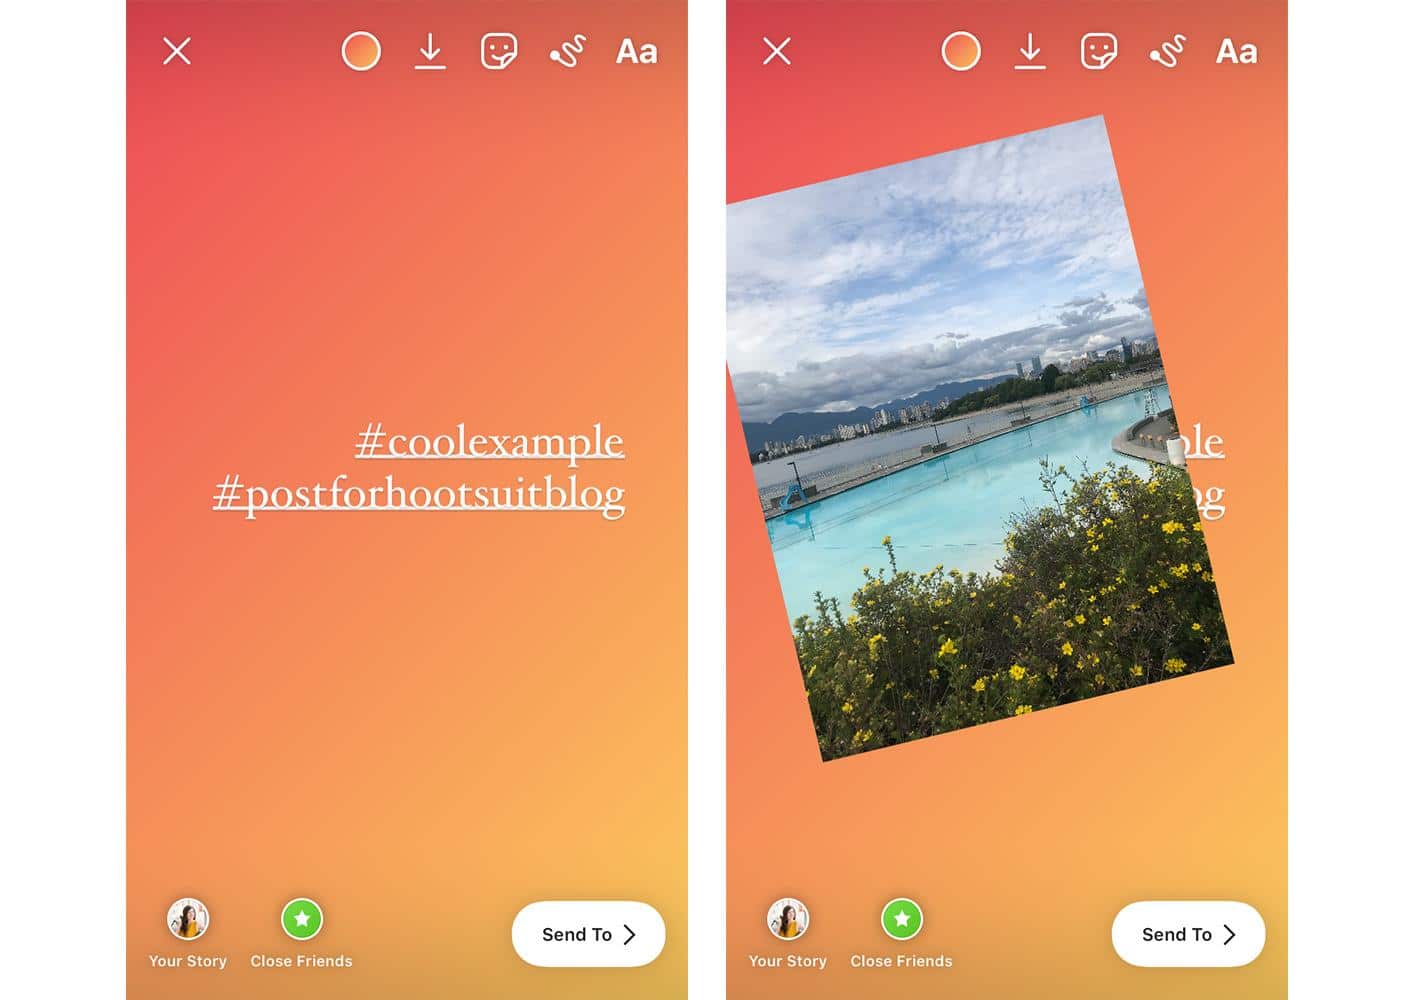
16. Hide hashtags and @mentions
Preserve your aesthetic vision by tucking unlighting hashtags or tags out of sight. It’s the digital equivalent of hiding your electrical cords behind your mid-century-modern desk before Architectural Digest comes a-knockin’.
How to do it:
Method 1
- Type out your hashtags and mentions.
- Hit the stickers button and select your camera roll.
- Add an image from your camera roll, which will be placed on top of your hashtags to obscure them.
- Resize your image to fill the screen: the hashtags are technically there for Instagram to read, but human eyes won’t be able to see!
Method 2
- If you start off creating a post with an image, add a text box on top and type your hashtags and mentions.
- With the text box still active, click on the rainbow wheel at the top of the screen.
- Tap the eyedropper icon.
- Tap a spot on the photo to change the text to that same color and blend in.
- Resize the text box if necessary.
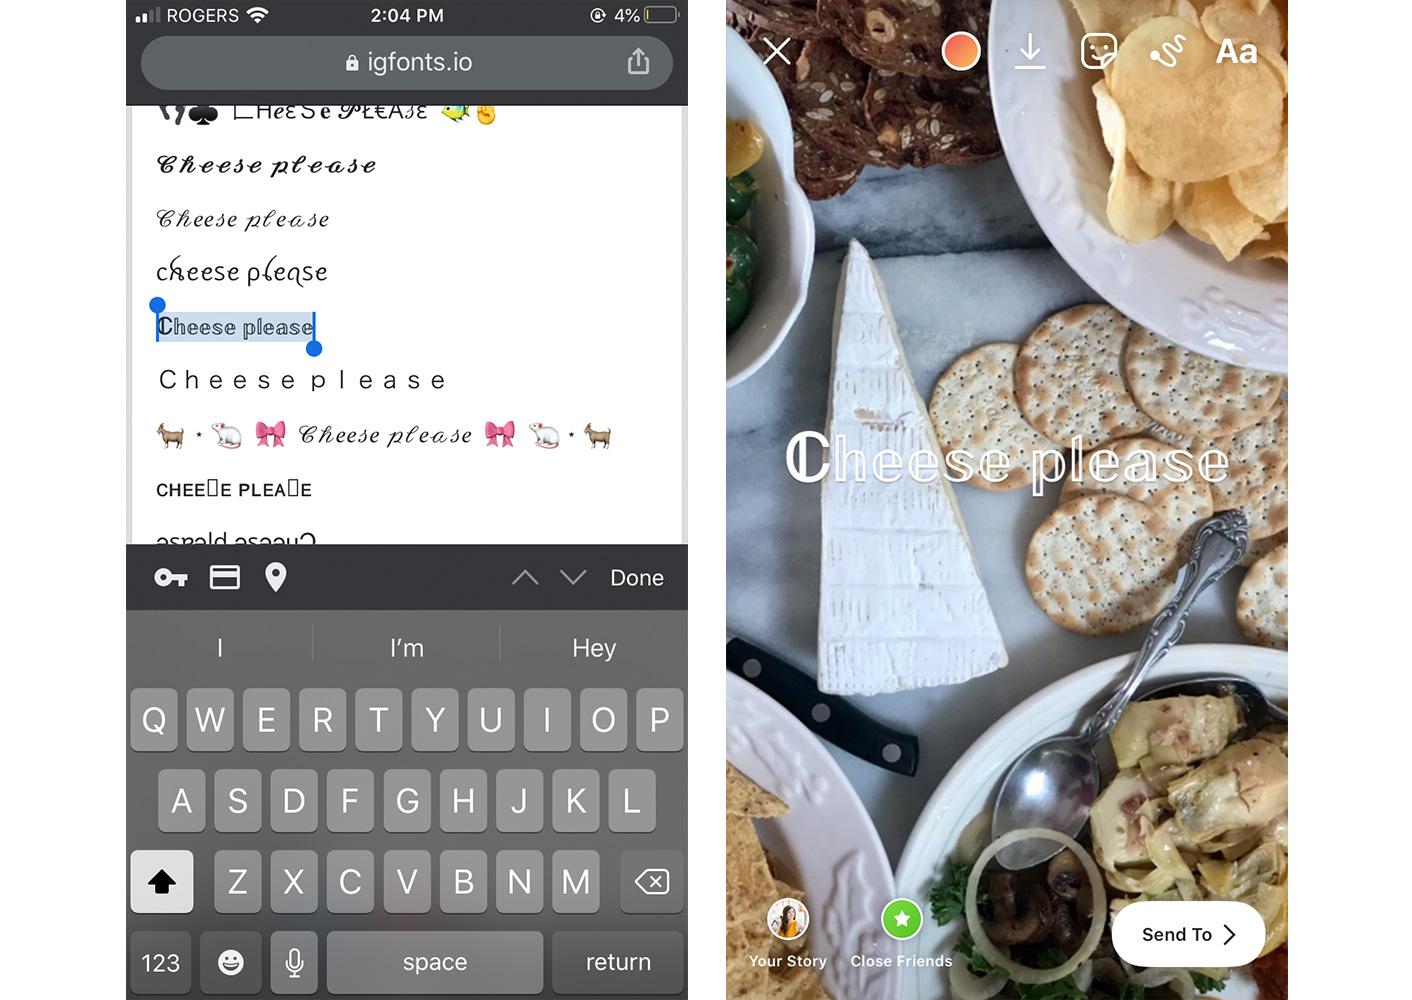
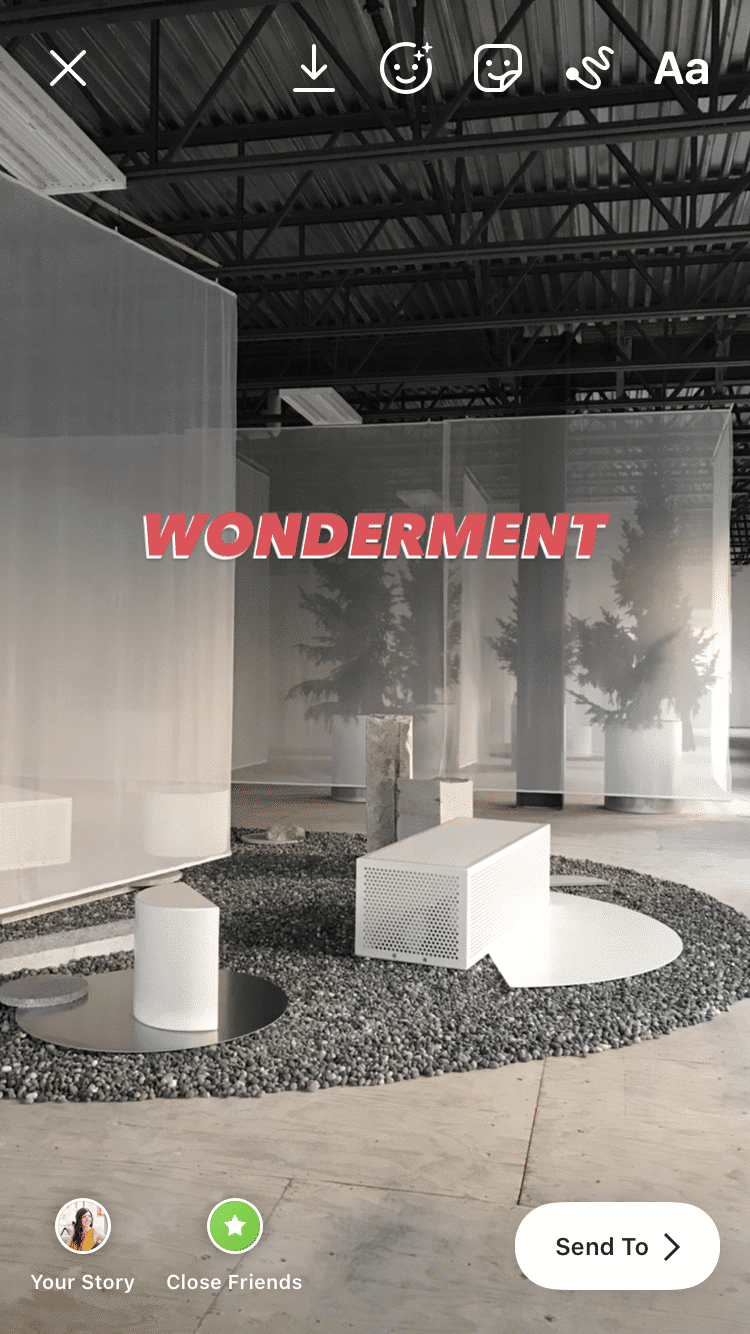
17. Express yourself with even more fonts
The standard Instagram Story fonts are just the tip of the typographic iceberg.
If the in-app typewriter or Comic Sans-knockoff lettering isn’t doing it for you, find something more exciting to paste in.
How to do it:
- Head to the Instagram Fonts Generator website on desktop or mobile.
- Type in your message and hit enter to see your font options.
- Copy the message and paste into the Instagram Story text box.
Pro tip: If you have a branded font, add your text right to an image with Photoshop, Over, or another image editing app, and then upload to Stories from there.
18. Layer text to add a shadow effect
For text that pops, try this double-up trick.
How to do it:
- Type out your text, then select all and copy.
- Start a new text box and paste in that text.
- With text still selected, click the rainbow wheel at the top and choose a different color.
- Shift that text ever so slightly and layer underneath the original text so it looks like a shadow effect.
19. Change text alignment in seconds
Put your Tinder skills to good use here: a quick swipe of the text will spice things up and shift things left, right, or back to center in a snap.
How to do it: As you’re typing, quickly swipe to the left or right to realign.
Instagram sticker hacks
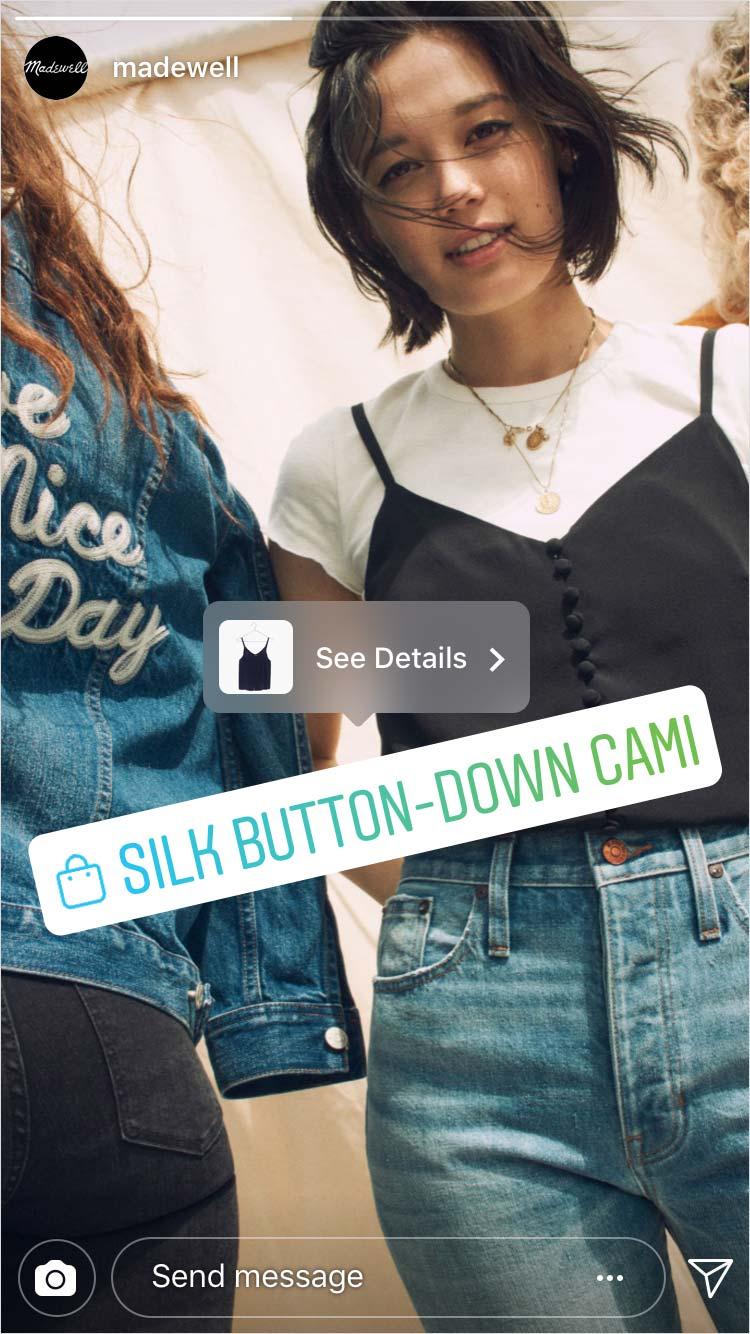
20. Turn your Story into a shopping spree
If you’ve got an Instagram Shop, you can tag your one product in each Instagram Story with a product sticker.
When shoppers want to learn more about that cool hamster-print vest, they’ll just click on the sticker and head to your Shop to begin their digital shopping spree. Learn how to set up your Instagram shop here.
How to do it:
- Build your Instagram Story and tap the sticker icon.
- Select Product.
- Choose the item from your product catalog.
- Customize the product sticker to suit your brand.
Source: Instagram
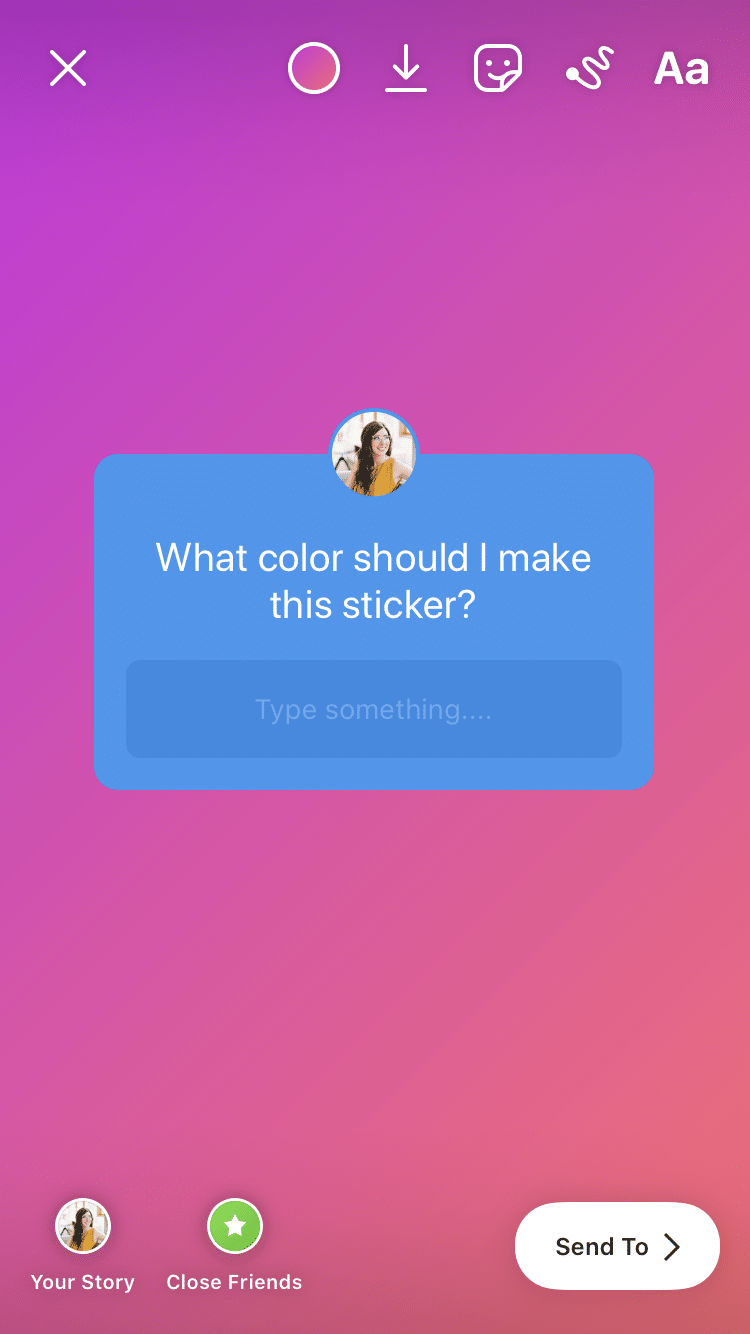
21. Change the color of a question sticker
To color coordinate or not to color coordinate? This is the question… or rather, a question about what to do with your question sticker.
How to do it:
- Tap the sticker icon and select Question.
- Type out your question and then tap the rainbow wheel at the top of the screen.
- Continue to tap until the question sticker is the color of your choosing.
22. Access more gifs than ever
If there’s such a thing as too many gifs, we don’t want to hear it.
While Insta’s search allows you to peruse Giphy’s library, using the Giphy app itself allows you to create albums of your favorites for easy access—and you can share right from Giphy.
How to do it:
- Open the Giphy app and find the gif you want.
- Click on the paper-airplane share icon (or the heart icon if you’d like to favorite and post later).
- Select the Instagram icon and then choose Share to Stories.
- OR select Copy GIF and then paste into your Story.

Pro tip: If you have your own homemade gifs that you’d like to share on Insta Stories, save them to your camera roll and just copy and paste directly into a Story.
23. Create a Grid of Photos
Instagram Stories’ built-in layout tool feature is the perfect way to share multiple images in a variety of neatly organized grids, formatted to the specific dimensions of Stories. Because sometimes you just can’t choose which picture of your sushi dinner is the cutest, we get it!
How to do it:
- On the left-hand side of the screen, scroll to find the Layout tool a square with disecting lines).
- Your screen will now be divided into quadrants. Add a photo to the first square by swiping up to select one from your gallery, or use the camera to take a new picture.
- Repeat for each quadrant.
- Alternatively, switch up the layout by tapping the Change grid icon on the left-hand side of the screen.
Instagram Story video hacks
24. Answer questions on a Live Story
Answering your followers’ questions on an Instagram Live Story is like a fun interrogation you’re doing to yourself. (Need some help getting started with Instagram Live? Check out our step-by-step guide here.)
How to do it:
- Prompt your audience for questions in advance of your Q&A with a Questions sticker.
- Once you’ve gone live, tap the question-mark icon at the bottom of the screen.
- Tap the question you’d like to answer, and it will appear on your Live screen as you broadcast.
- Questions will be greyed out once they’ve been selected so that you don’t pick the same one more than once.
25. Pin a sticker to your video
This is one of the oldest Instagram Story tricks in the book, but we’re not too big to admit that the mechanics of it have stumped us for years. If you, too, have been longing to pin a sticker, emoji, gif, or text to a specific moment or motion in a video, here’s the breakdown.
Pro tip: not sure which Instagram emoji to use in your Story? Try our free emoji translator.
How to do it:
- This is essential: film the video within the Instagram Story. You can’t upload a video for this trick! We’ve tried! We’ve failed!
- Add a sticker (or text, etc) to the Story.
- Tap and hold that sticker.
- Use the slider to scroll to the right point in your video.
- Tap Pin.

26. Make your own Instagram filter
You don’t need to be a programmer to create your own custom filter to use or share with the world. Spark AR Studio has a ton of tutorials and simple step-by-step tools to help you put your stamp on the world (and, more specifically, your followers’ faces).
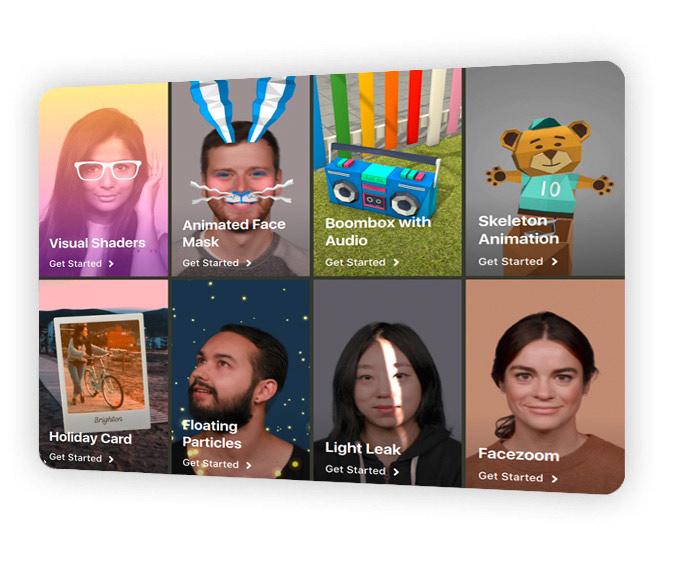
Source: Spark AR Studio
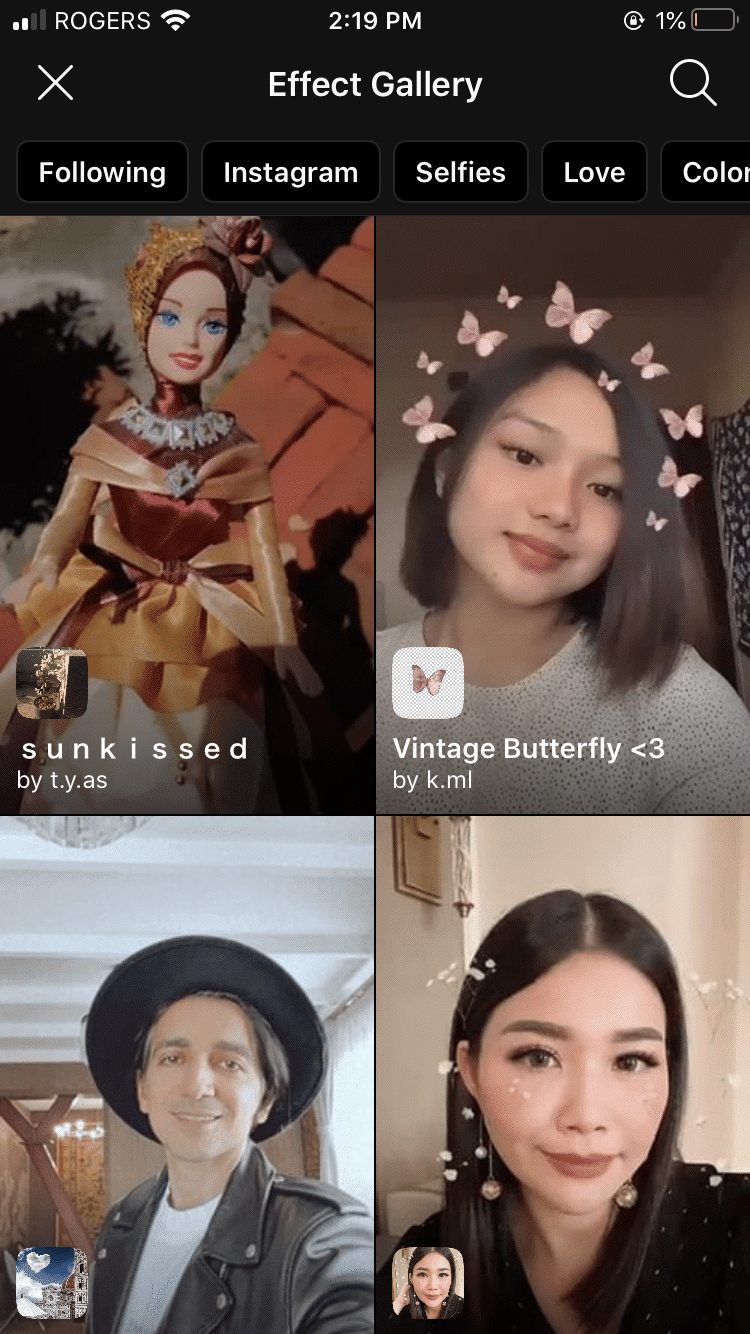
27. Save your fave filters
You want to have your Elf Ears filter at your fingertips, we get it. Thankfully, there’s a way to build an easy access library of your favorite effects.
How to do it:
- Open up your Instagram Stories camera.
- Swipe through the filters at the bottom of the screen until you get to the end .
- Tap the icon of a magnifying glass that says Browse Effects.
- Find an effect you like and click the bookmark symbol.
- Next time you open your camera, that effect will be available to select.
- If you see an effect you like on someone else’s Story, click on the name of the effect (near the top of the screen) to save it from there.
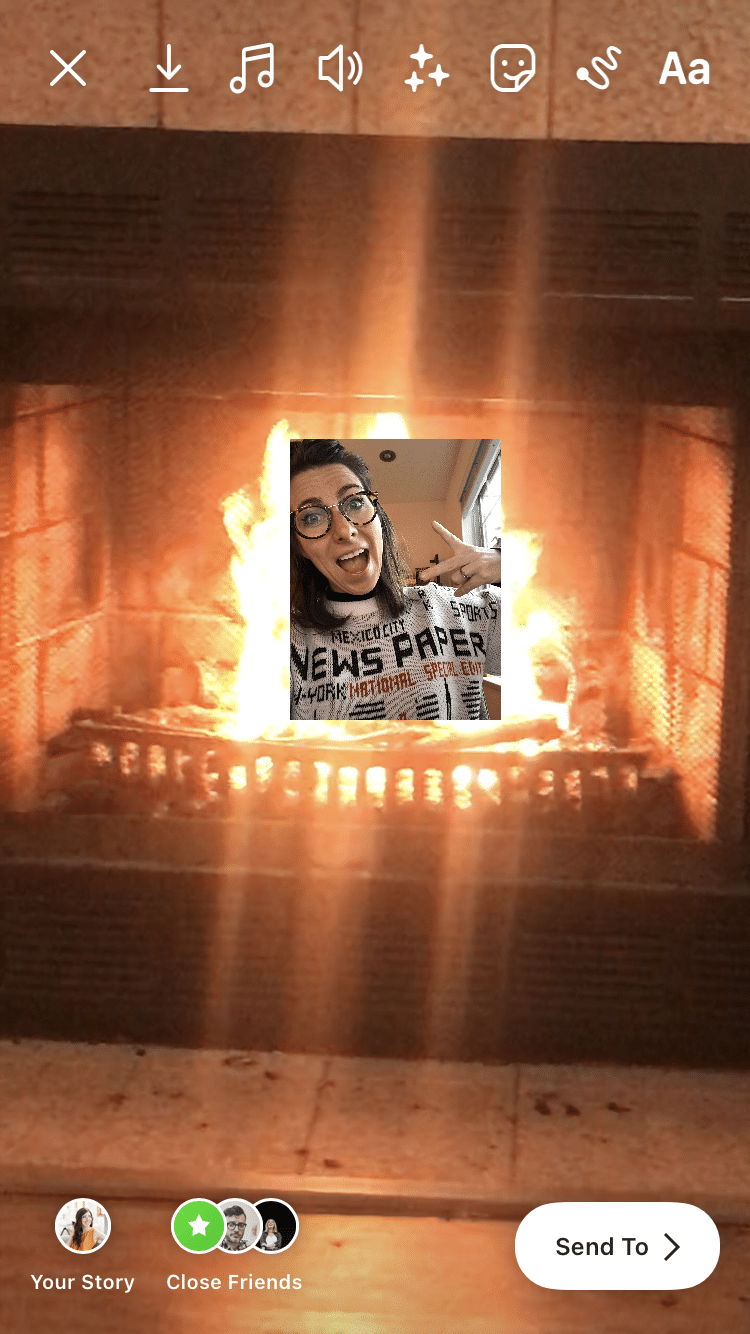
28. Use video as an animated background
Picture this: a dynamic, moving backdrop for a gorgeous selfie or sick product photo. There’s only one word for this slick combination of animated and still imagery: jazzy.
How to do it:
- Record a video or swipe up to choose one from your photo gallery.
- Open up the sticker menu.
- Select the photo sticker.
- Choose the photo from your photo gallery.
- This’ll layer on top of the video: move the photo or resize to your heart’s delight!
29. Share your Reels to your Stories
Locate your favourite Reel and tap the airplane icon to send it to your Story, so you can impress even more ‘Grammers with your Celine Dion lip syncs.
The bad news is that Instagram Reels get cut off after 15 seconds, but if you want to learn how to share a full 60-second Instagram Reel to your Story, we’ve got a hack for you!
30. Use templates and design tools to make your Stories pop
Sure, a great chef can prepare a delicious meal with just a knife and a pan… but a kitchen full of tools will make creating a gourmet experience that much easier.
Likewise, branching out from the basic elements of Instagram Stories and incorporating external design and editing apps into your creative process will open up a whole new world of possibilities.
Is this a good metaphor, or am I just hungry? Download some apps and we’ll check in after lunch.
How to do it:
- Try some of these fun Instagram Story Apps to take your images and videos to the next level.
- Download these free Instagram Stories templates and make ‘em your own.
Of course, no amount of hacks (or tips, or tricks, or gadgets or gizmos aplenty) can compare with good ol’ fashioned quality content. But we’ve got you covered there too: here are 20 creative Instagram Story ideas here to kick off some inspiration.
Manage your Instagram presence alongside your other social channels and save time using Hootsuite. From a single dashboard you can schedule and publish posts and Stories, edit images, and measure performance. Try it free today.