The question here is why you should schedule Instagram posts. Scheduling social media content has tons of important benefits for creators, influencers, and social media managers.
On the Instagram app, in particular, creating and scheduling your content in advance allows you to focus on the high-quality images and well-edited videos that thrive there. That’s just one reason an Instagram scheduler can be a game-changer.
It also allows you to work interrupted for the rest of your workday so you have a chance to tackle responsibilities like community engagement, reporting, analysis, and strategic planning. (And avoid getting up at 3 AM to post content when your international audience is most active.)
Since 38% of all social “teams” are actually just one person, scheduling posts is a critical way to get more out of the very limited number of hours in your day.
Here, we break down how you can schedule posts, Stories, Threads, and even Reels – so you can plan and execute effective Instagram campaigns rather than wearing out your thumbs posting on the fly.
Key takeaways
- Scheduling Instagram posts lets you save time and maintain consistent content, freeing you up for content creation and boosting engagement and content strategy.
- You can schedule posts directly through Instagram, Meta Business Suite, or Hootsuite, with Hootsuite offering multi-platform management and advanced Instagram scheduling tools.
- Best Instagram practices include scheduling during peak engagement times, reviewing analytics to optimize posts, and adjusting content schedules when needed.
Can you schedule Instagram posts in advance?
This is an easy one: Yes. In several different ways, in fact. We’re about to show you three different options for scheduling Instagram posts.
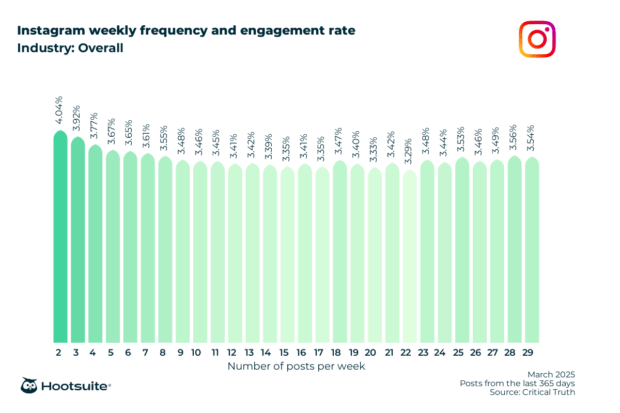
On Instagram, the highest engagement rate of 4.04% is achieved by posting just twice a week.
How to schedule Instagram posts: 3 ways
Heads up: To use any of these scheduling methods, you need to have an Instagram professional account.
If you’re currently using a personal account, you’ll have to switch to an Instagram Business or Creator account before scheduling posts. Fortunately, it’s free, and it only takes a minute.
Need help switching? We’ve got a step-by-step guide to walk you through the process.
How to schedule posts on Instagram (the app)
This method works for both posts and Reels, but not Stories.
1. Open Instagram, tap the plus icon, then tap Post or Reel to create your content as usual.
2. Once you’ve made your edits and added your caption, scroll down to the bottom of the screen and tap Advanced Settings.
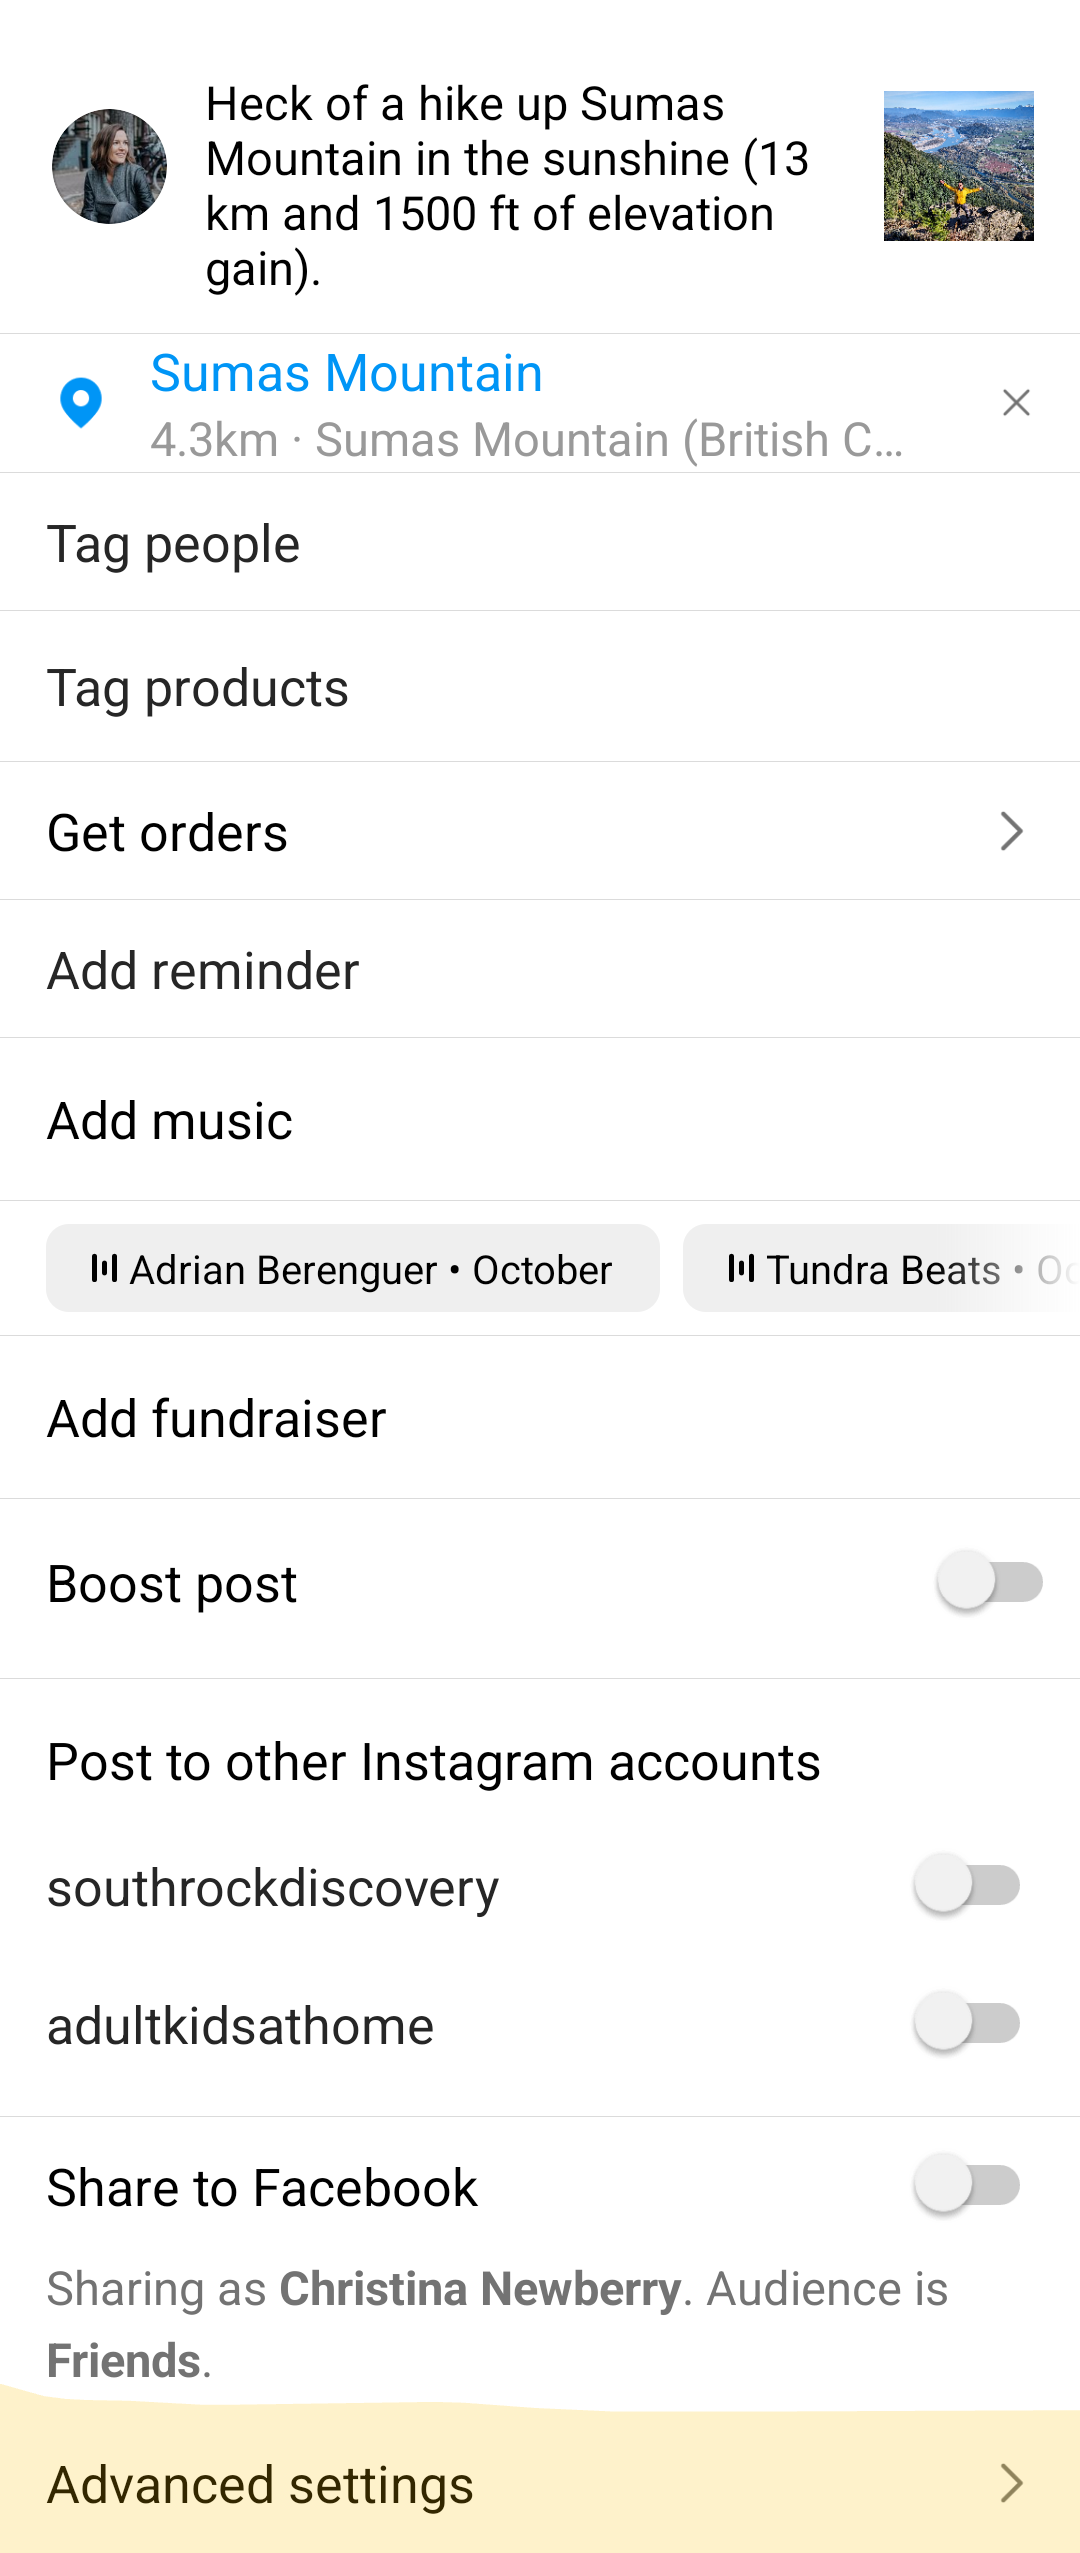
3. Toggle the Schedule switch on and choose the date and time you want you post to go live.
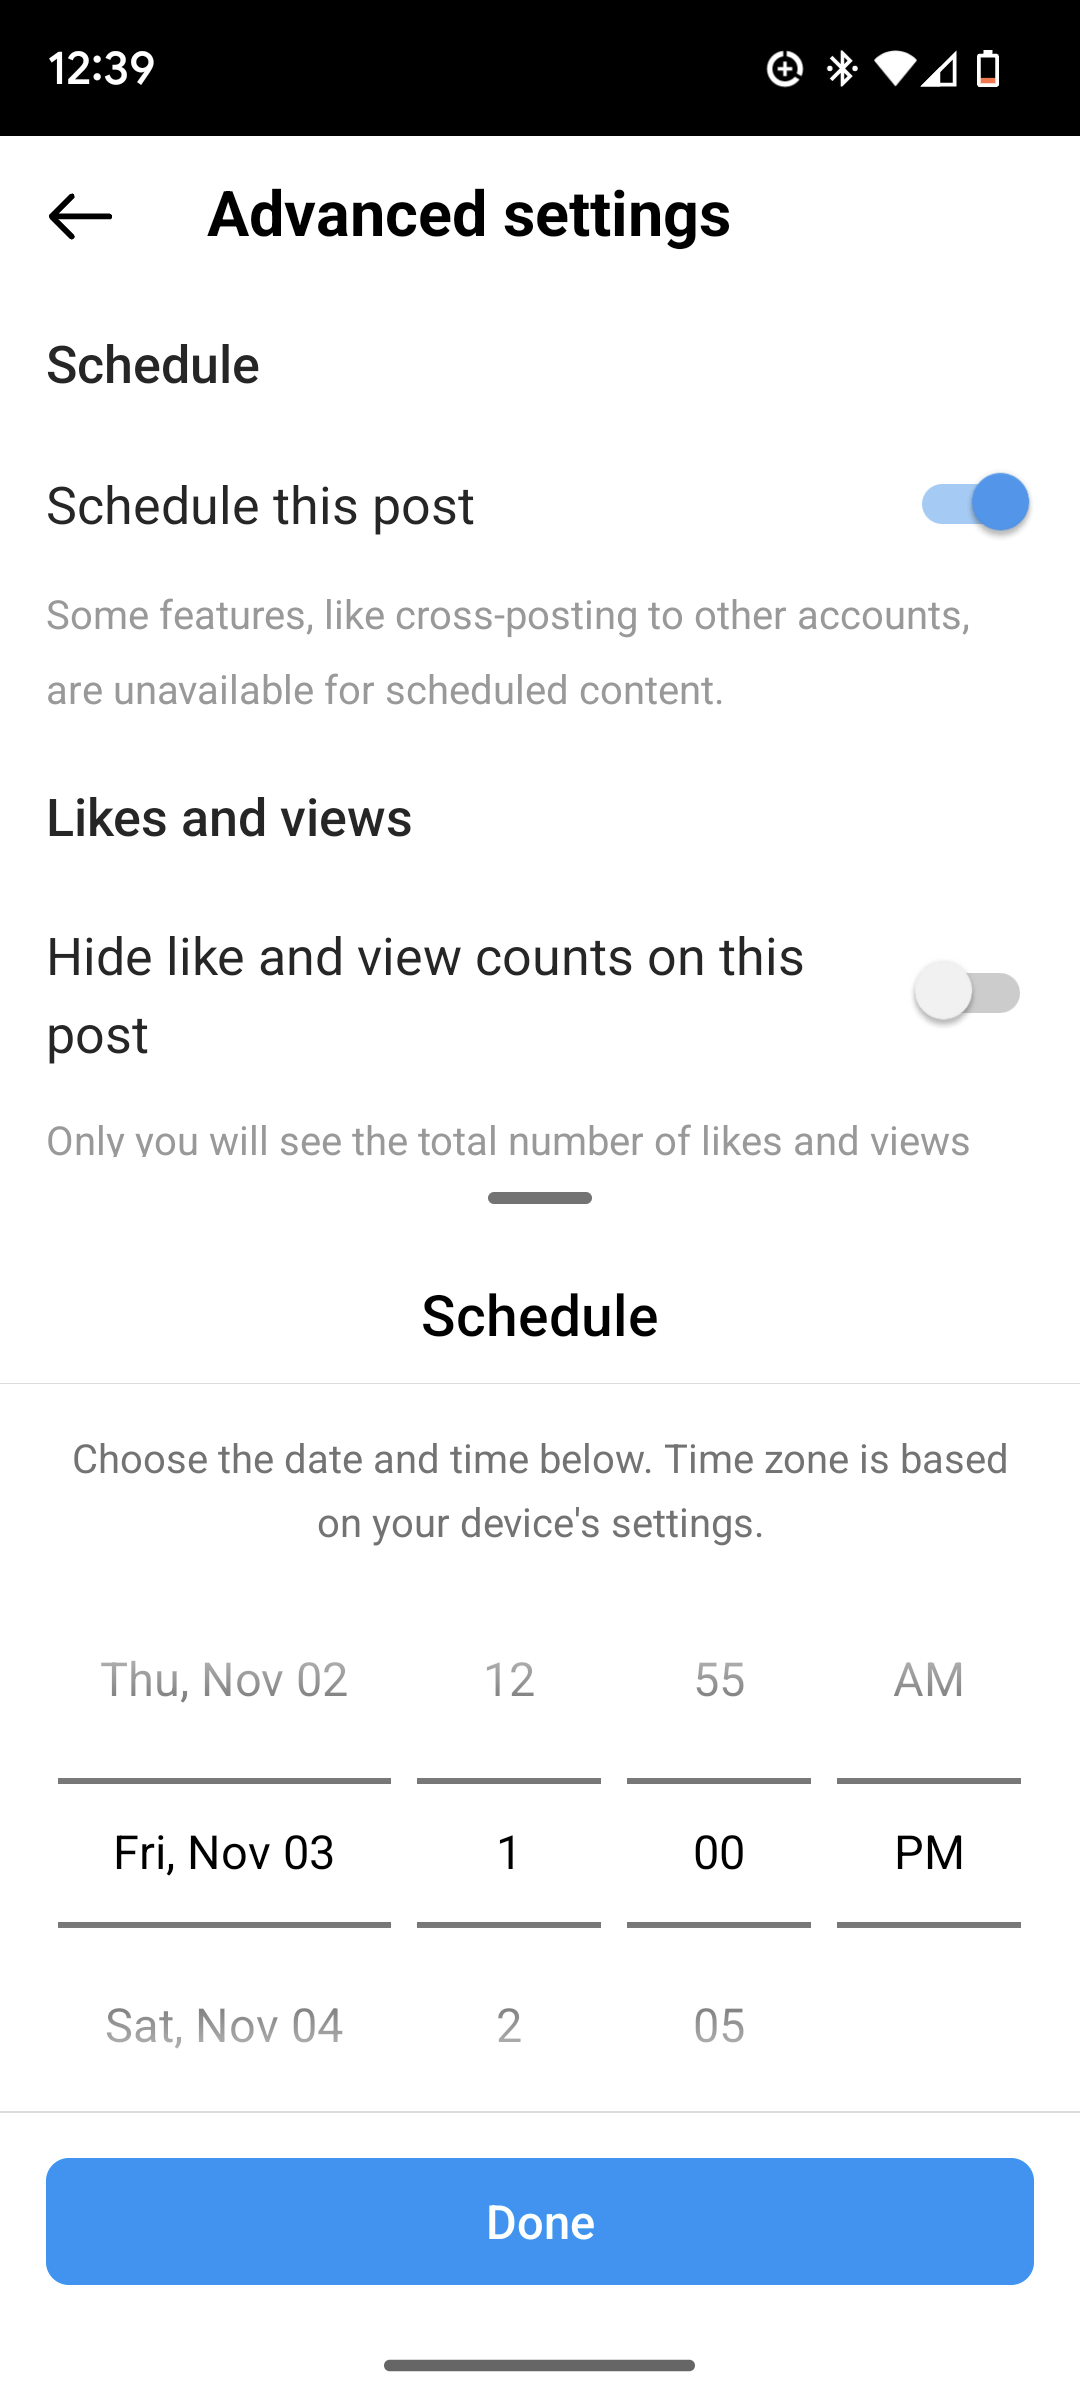
4. Tap the back button and then tap Share to schedule your post.
5. If you want to revise your scheduled posts, open your Instagram profile and tap the menu icon in the top right.
6. Tap Scheduled content, then tap the three dots next to the relevant post or Reel to edit, reschedule, share now, or delete.
Note that you can schedule a maximum of 25 posts per day and a maximum of 75 days in advance.
How to schedule Instagram posts in Meta Business Suite
If you’d prefer to schedule posts on a desktop rather than a mobile device, you can use Meta Business Suite. This method allows you to post Stories as well as Reels and posts.
To schedule Instagram posts from your computer using Meta Business Suite, follow these steps:
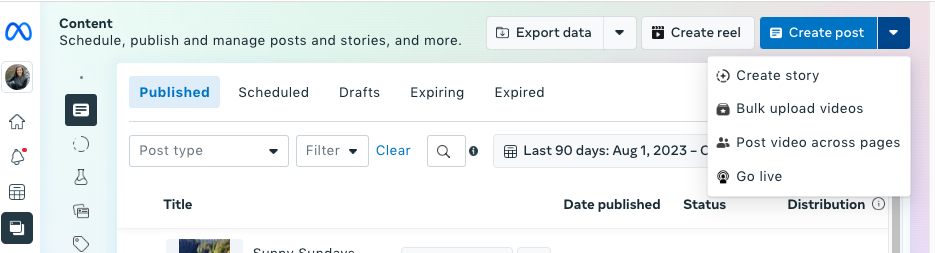
1. Open Meta Business Suite and click Content in the left menu.
2. Click Create Reel or Create post. To create a Story, click the down arrow next to Create post and choose Create Story.
3. Choose your Instagram account under Post to.
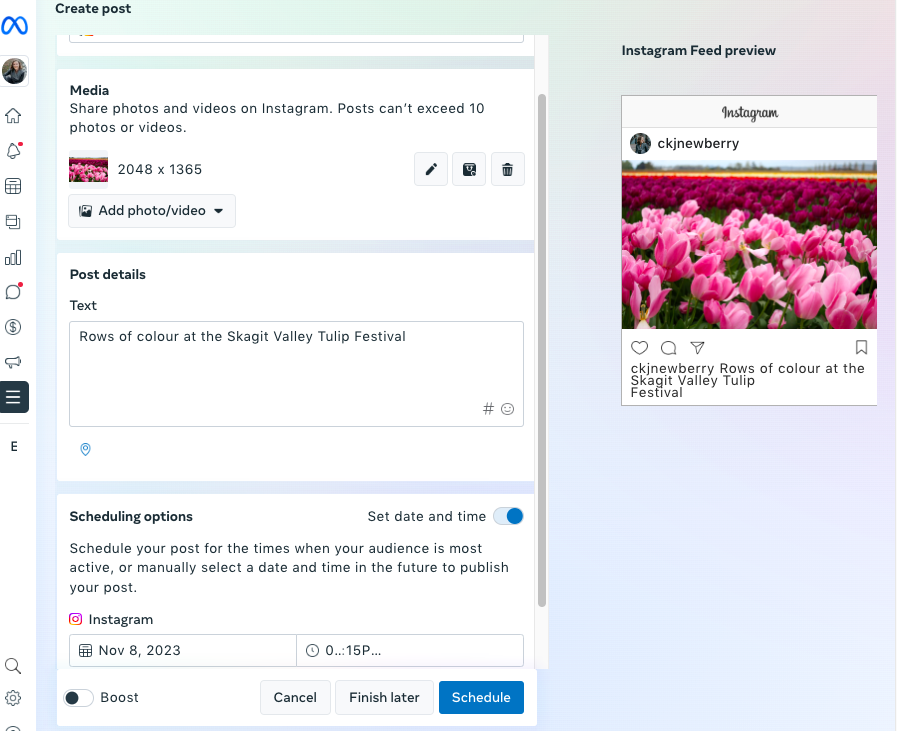
4. Complete your post, Reel, or Story with all the appropriate image(s), video(s), text, stickers, and so on.
5. Check to make sure you’re happy with the preview of your post or Story.
6. To schedule a post, slide the toggle on next to Set date and time. For a Story or Reel, click Schedule and enter your desired time.
That’s it! Now you can lean back and check your DMs.
How to schedule Instagram posts with Hootsuite
As described above, Meta Business Suite is a good tool if you only want to schedule content for Instagram and Facebook. But most social media pros can save a lot of time and energy using a social media management tool and handling all social channels from a single dashboard.
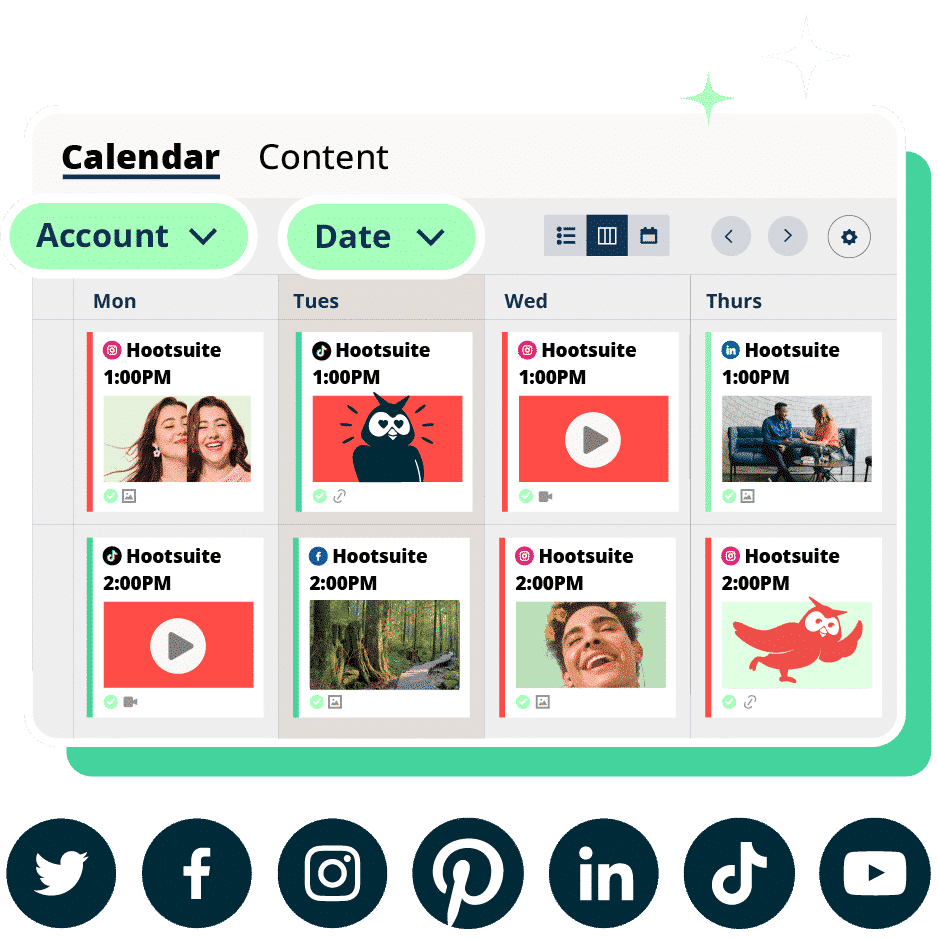
Hootsuite will help you schedule social media posts to Instagram and Facebook as well as TikTok, X (Twitter), LinkedIn, YouTube and Pinterest, all in one place.
You can schedule posts, Stories, carousel posts, Reels, and Instagram ads with Hootsuite. Here’s how.
1. Add your Instagram Business account to your social media management platform
If you’re using Hootsuite, it’s easy to link your Instagram account or other social media platforms. From the Hootsuite dashboard:
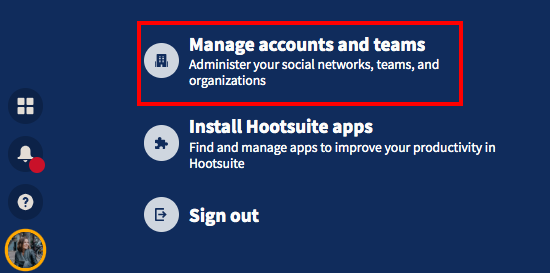
- Click your profile icon in the bottom left corner
- Next, click Manage accounts and teams
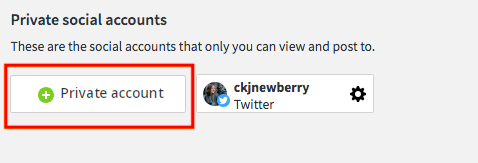
- Select + Private Network in the bottom-left corner
- Choose Instagram from the list of networks and choose Instagram Business.
- Click Log in to Facebook and enter your credentials. Choose the account you want to add and click Add.
For more details on this process, check out our very thorough help article.
2. Compose your Instagram post
- In your Hootsuite dashboard, click the Create icon, then select Post.
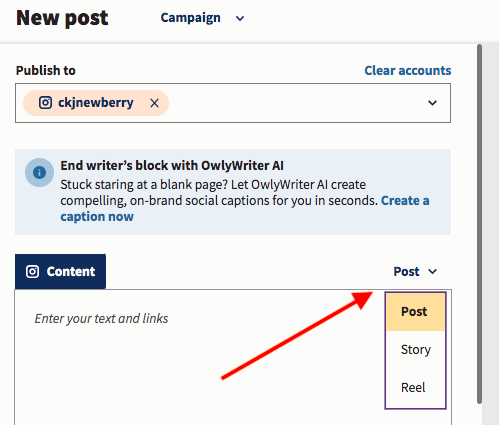
- In the Publish To field, choose your preferred Instagram account from the list. The default option is to create a post. To switch to a Story or Reel, tap the down arrow next to Post above the content box.
- Now go ahead and upload your visuals (or select them from your content library). You’ll also want to write an engagement-driving caption, add your hashtags, tag relevant accounts, and add your location.
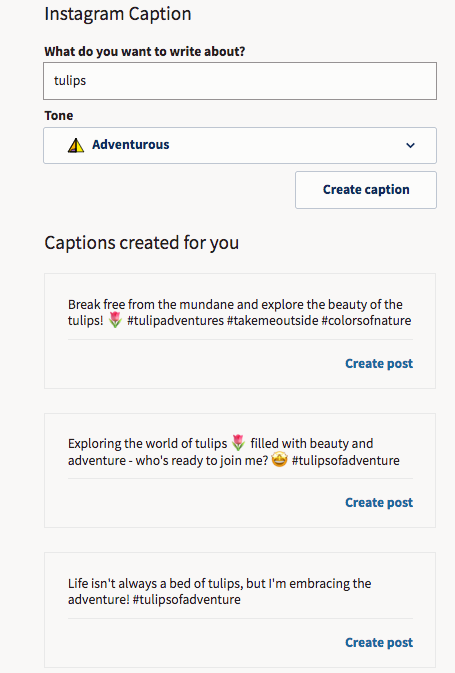
Optional: If you’re not sure how to caption your photo or video, click Create a caption now to try OwlyWriter AI. Save your existing post as a draft so you can return to it once you have the perfect caption.
Copy your desired Instagram caption, then find your draft on the Calendar tab to resume editing.
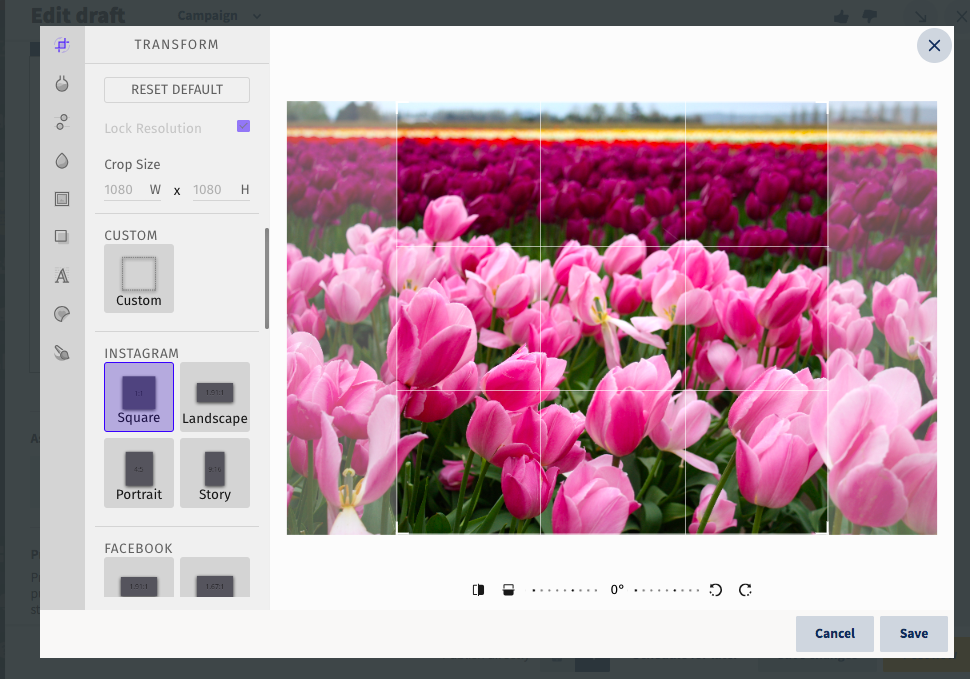
- If you haven’t already prepared your image for Instagram, it’s easy to do so here. Hover over the image in the content box and click the pencil icon to crop your visual to the required aspect ratios, filter it, and otherwise perfect it.
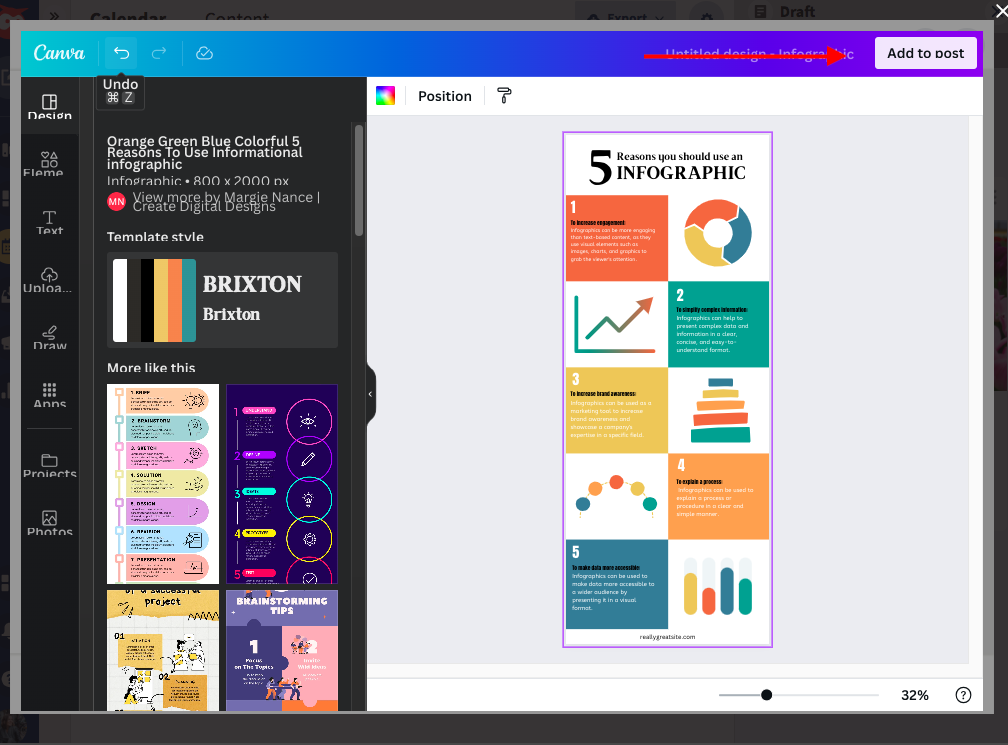
You can also edit your image using Canva’s editor inside the Hootsuite dashboard. No more switching tabs, digging through your “Downloads” folder, and reuploading files — you can seamlessly create beautiful visuals from start to finish without leaving Hootsuite Composer.
To use Canva in Hootsuite:
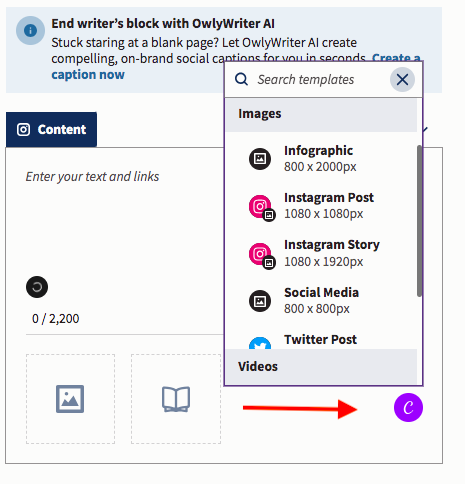
- Click on the purple Canva icon in the bottom right corner of the content editor.
- Select the type of visual you want to create. You can pick a network-optimized size from the drop-down list or start a new custom design.
- When you make your selection, a login pop-up window will open. Sign in using your Canva credentials or follow the prompts to start a new Canva account. (In case you were wondering — yes, this feature does work with free Canva accounts!)
- Design your image in the Canva editor.
- When you’re done editing, click Add to post in the top right corner. The image will automatically be uploaded to the social post you’re building in Composer.
3. Find the best time to post
Posting at the right time can help you reach your audience when they’re online. Plus, early engagement tells the Instagram algorithm that people like your content (and gives it a nudge to surface it in more users’ Instagram feed posts).
In fact, our research found that while it’s generally safe to post any time between 6 AM and 6 PM, Friday at 7 AM appears to be the best time to post on Instagram for engagement.
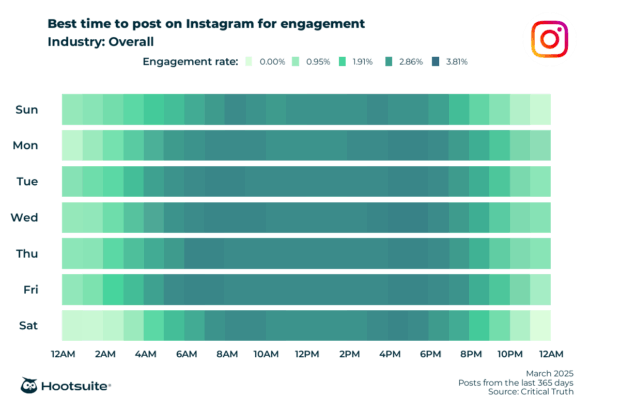
But no one wants to wake up early to post those Reels (we don’t, anyway).
Luckily, Hootsuite’s Best Time to Publish feature shows you your best time to post on Instagram based on your posts from the past 30 days. It groups posts by weekday and hour to identify when your posts had the highest impact, based on average impressions or engagement rate.
To find your best times to post, save your new post as a draft and follow the instructions below:
- In the left-hand side menu, click Analytics.
- Then, click Best time to publish.
- In the dropdown menu at the top of your screen, select the Instagram account you’re posting to.
You will see a heatmap highlighting your best times to post (based on your account’s historical performance). You can switch between three tabs: “Extend reach,” “Build awareness” and “Increase engagement” to find the time that will work best for your specific goals.

4. Schedule your post
All right, now comes the easy part. Click Schedule for Later in the bottom right, and select the date and time you’d like your post to go live.
If you skipped the step above and didn’t go to analytics to look up your best times to auto-publish, you will see a couple of recommended posting times once you select a date. You can pick one or manually set a time.
That’s it! You can review your scheduled posts in the Hootsuite Planner, and edit them there before they go live, as well.

Best practices for scheduling Instagram posts
If you’re ready to take the plunge and get really efficient with your posting habits, these tips will help keep you ahead of the game.
1. Post at the right time
In general, posting when your followers are online is key. That’s because early engagement is a value signal for the Instagram algorithm.
That’s one reason why simple cross-posting may not work. Your audience on Facebook may be active from 6 – 10 PM on weeknights, but browsing Instagram from 1 – 4 PM.
The right Instagram analytics tool will tell you when your audience is most likely to be online and/or engage with your post.
For the Hootsuite social media team, that time is 8 AM-12 PM PST or 4 – 5 PM PST on weekdays. For you, it might be different.
Hootsuite’s Best Time to Publish feature can show you your individual best time to post on Instagram based on your posts from the past 30 days.
It will also suggest time slots that you haven’t used in the last 30 days so that you can shake up your posting habits and test new tactics.
2. Pause or adjust your posting schedule when necessary
When it comes to Instagram scheduling, going much farther than a week or two in advance can start to increase the risk of something going sideways.
You don’t want to cause a social media crisis for your brand by posting something insensitive. If something unexpected happens, you may need to pause your content calendar entirely (Hint: You can do that with one button in Hootsuite). You might even need to use your social channels to communicate during a crisis.
Posting everything too far in advance also makes it tricky to stay on top of the latest trending audio, trending effects, and popular memes. That said, posting evergreen and non-time-sensitive content in advance actually frees you up to jump on those trending moments as they happen.
Our advice: Keep your finger on the pulse and stay nimble.
3. Don’t get carried away
Yes, the miracle of Instagram scheduling means you can increase the quantity of your posts without sacrificing quality. But should you?
The short answer is “maybe.” The long answer is “maybe, if you can maintain consistent quality at that pace over the long term.”
Consistency matters more than frequency when it comes to engagement. Remember that the algorithm prioritizes good relationships: if your followers are engaging with your Instagram content, the algorithm will show more of it to them.
4. Optimize and edit
Great visuals are key on Instagram. Get yourself an Instagram scheduler that allows you to edit your photos in the same dashboard you publish from. It’ll save you much more time and ensure that your images are fully optimized before posting.
Scheduling also allows the chance to double-check and proofread the text that accompanies your Instagram content. And for big teams with a lot of moving parts, an internal multi-stage approval system is ideal for preventing a gaffe.
5. Analyze and adjust
Now that you know how to schedule an Instagram post, you’ve got time to take a look at the big picture.
Are you creating content that works for your audience? What’s earning likes? What’s falling flat?
Choose your preferred Instagram analytics tool (or hit the Analytics tab in Hootsuite) and start exploring.
Use Hootsuite to schedule Instagram posts (and Stories, Threads, and Reels) for the optimal time, respond to comments, track competitors, and measure performance — all from the same dashboard you use to manage your other social networks. Start your free trial today.